Moon Hunter Keep is a 4-player group dungeon located in north of Senalana, on the Cyrodiil side of the Strid River in The Elder Scrolls Online. It is part of the Wolfhunter DLC. It features Normal and Veteran Modes. Players can use the Group & Activity Finder tool to easily find groups to tackle this dungeon with.
As of Update 19 (Eso patch ??), the last boss of the dungeon drops the ?? Style motifs chapters, and all bosses in the dungeon drop the crafting material: ??
Moon Hunter Keep Veteran Walkthrough & Strategies
This is a challenging dungeon in Veteran modes. Players should form a well-geared party at endgame level.
"An ancient werewolf of incredible power named Vykosa has captured Moon Hunter Keep and destroyed the Order of the Silver Dawn's garrison. Now, Vykosa draws more and more of Tamriel's were-beasts to her cause, and she has begun to amass a monstrous army.
You and your team must enter the once-proud headquarters of the Order, battle your way through hordes of were-beasts and other monsters, make your way to the heart of the keep, and confront Vykosa herself before she threatens all of Tamriel"
Suggested group composition for Moon Hunter Keep
- 1 Tank
- 1 Dedicated Healer
- 2 DPS
Short summary of dungeon goes here.
You will also encounter challenging enemies that teach you game mechanics:
- Example: Simple description
- Example: Simple description
- Example: Simple description
- Example: Simple description
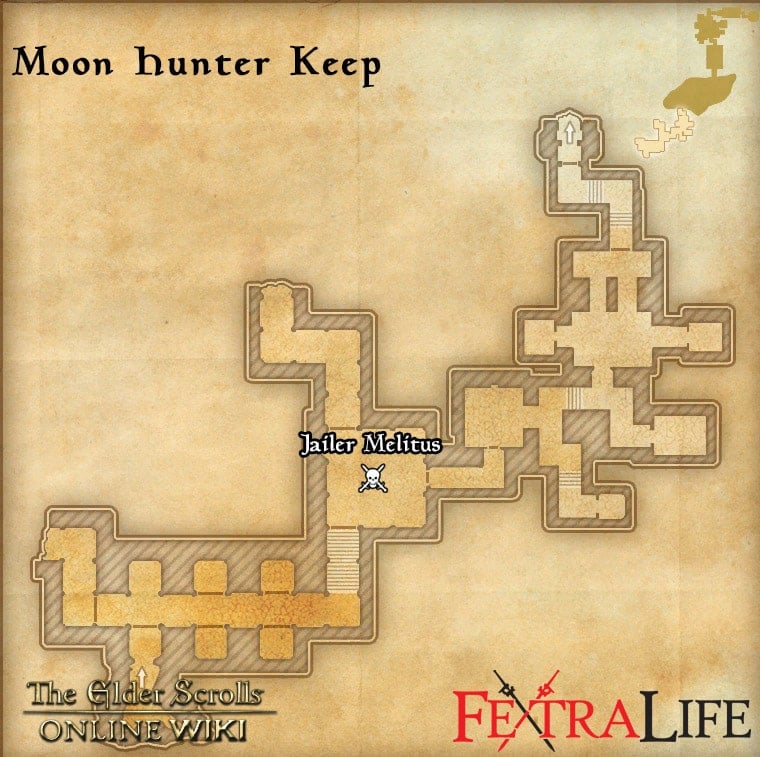
Jailer Melitus
Level: CP 160
HP:
Strategy:
This is a very basic boss but has lots of dangerous AOEs. Keep moving to dodge the AOEs. Cleave down or focus down the werewolf adds. Occasionally the boss will stun a player, usually the tank, and start charging a heavy attack. Interrupt him immediately.
Positioning for this fight: ??
Mechanics:
- ??
- ??
- ??
Tank: ??
DPS: ??
Healer: ??
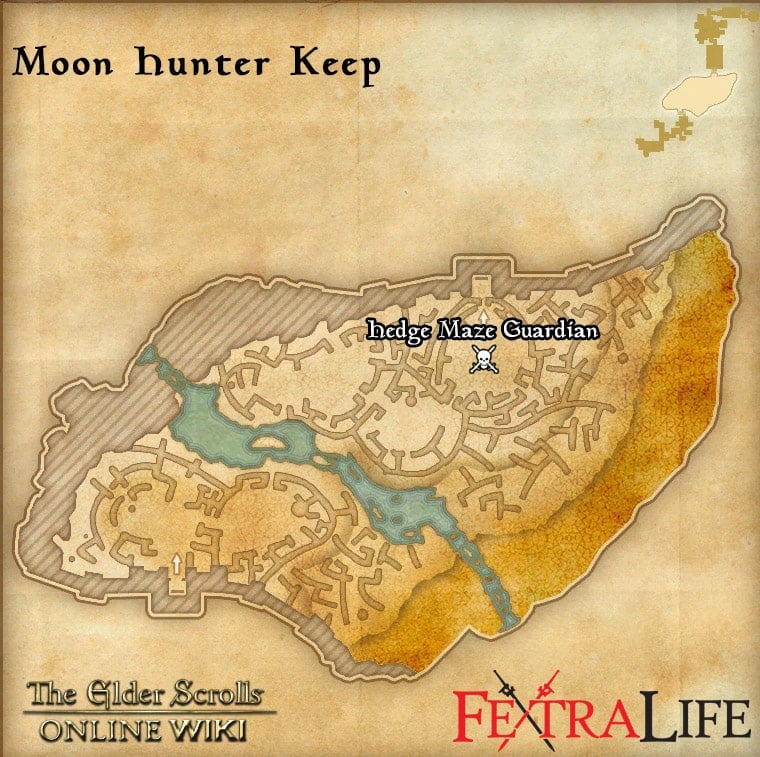
Hedge Maze Guardian
Level: CP 160
HP:
Strategy:
Occasionally this boss will root a player and dealing great damage to them. You must dodge roll out of roots otherwise you may get killed.
Positioning for this fight: ??
Mechanics:
- The Lurcher is in a hedge maze, and at 80, 55, 35% health, Spriggans will activate to heal the boss back up to the trigger health percentage.
- ??
- ??
Tank: Distract boss from attacking healer and DPS when possible. Watch out for his AOE. Keep boss in the center courtyard and away from Stranglers. Block all heavy attacks or be one shot.
DPS: . DPS may need to stay together, and NOT spread out when hunting down Spriggans in the maze.
Healer: Stays with Tank.
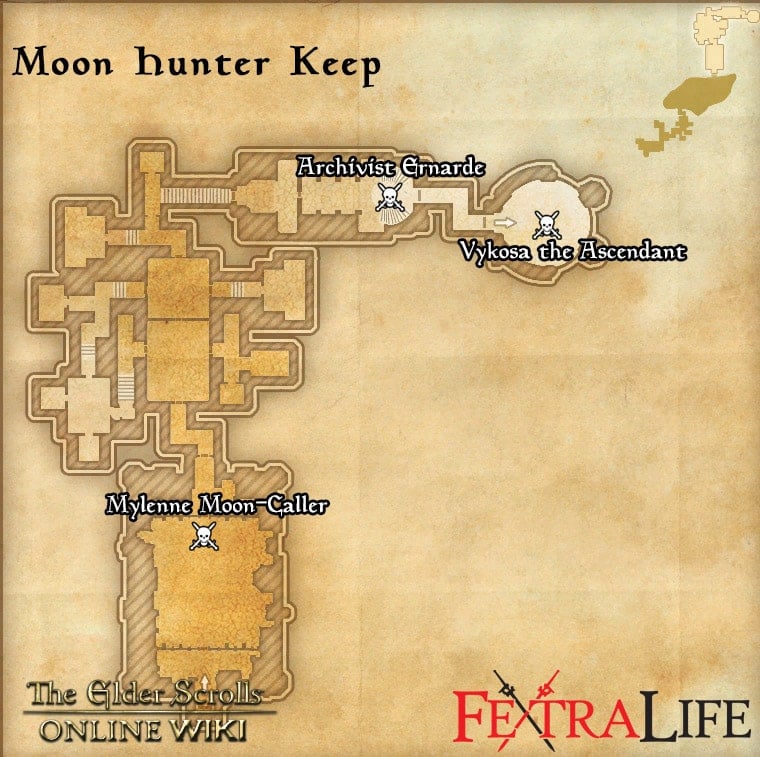
Mylenne Moon-Caller
Level: CP 160
HP:
Strategy:
This Boss will occasionally pounce on a random player and stun them. Try to spread apart since it will also stun any players near the player it pounces. The boss must be interrupted by another player ASAP (about 3s ) or the stunned player will get killed. All players need to keep an eye on the boss at ALL times because this pounce.
Positioning for this fight: ??
Mechanics:
- ??
- ??
- ??
Tank: Stay close to boss. Boss will enrage periodically, increasing its damage based on how many Shock Wardens are alive. When a Shock Warden dies, its corpse will spawn an AOE, brought the boss through that AOE to get rid of its enraged buff.
DPS: Focus on Shock Wardens. Each Warden alive adds another Enrage stack to the boss, reducing its damage taken.
Healer: Stay with Tank.
Archivist Ernarde
Level: CP 160
HP:
Strategy:
??
Positioning for this fight: ??
Kill order: ??
Mechanics:
- Ground Slam: a ground AOE around the werewolf that will one shot everyone except the tank, even blocked.
- Color Symbol Mechanic: Four pads of three different colors, for a total of twelve pads with the colored symbol floating above them will spawn around the room. Then the boss will start cycling through the symbols above his head, and each pad will also start randomly cycling its colored symbol. The boss will stop on one of the colored symbols and then all players must find their own pad with the same color symbol the boss landed on. Tank and Healer should prioritize the symbols near the entrance where they are for the duration of the fight, while DDs prioritize the ones on the stairs spread out to find colors in other areas of the room. Hint: While boss is cycling through colored symbols, get a good look of where the pads are around the room so you have an idea of where your nearest colors are.
- Bubble Mechanic: Occasionally the boss will spawn a bubble on a random player. This will lock that player down, and will kill them if that bubble isn't destroyed within a few seconds. The DPS must burst down the bubble on whatever player it lands on as top priority.
Tank: Stay in front of boss at a medium range away (out of the boss's passive aoe) and watch out on the adds. Main boss does not required to be taunted. When a Werewolf Behemoth transforms in, taunt and turn that werewolf away from the other players. NEVER bring the adds near the main boss, as the passive aoe around the boss will enrage those adds.
Healer: Stay close to the entrance, use healing spells at range.
DPS: Adds will spawn in based on health left. Do NOT DPS the boss while adds are alive. Position yourself half way up the stairs on either side of the room. Focus down adds immediately as they spawn, kill them before either turns into a werewolf colossus. ( focus the non-transformed add first! )
Vykosa the Ascendant
Level: CP 160
HP:
Strategy:
??
Positioning for this fight: ??
Kill order: ??
Mechanics:
- ??
- ??
- ??
Tank: The pets of this boss are chained to the wall and they share one chain. If one pet is pulled far from the wall, it'll force pull the other pet closer to the wall, immobilizing it. Taunt ONE of the pets to the main boss spawn location, so the other one will be forced to stay away from other players.
DPS: Focus on the pets Zel and Ary individually. Melee focus the pet that the tank has taunted, while ranged focused the pet that is chained tightly to the wall (keep a distance of the one chained to the wall). When Pets reach 0 health, they'll retreat to where they are chained to the wall and be out of combat until main boss reaches the next phase. Repeat the same strategy when the pets return. Werewolf adds spawn when boss drop enough HP, kite and kill the spawns, then DPS the boss! Four werewolves will spawn on the last wave, so they must be kited and snared well.
Healer: Stay in center of arena and heal the tank.
Trivia
- Dungeon Gallery
Moon Hunter Keep Information
- Location: In north of Senalana, on the Cyrodiil side of the Strid River (Zone = Reapers March)
- Suggested Level: CP 160
- Final Boss: Vykosa the Ascendant
Achievements
- Moon Hunter Keep Vanquisher
- ??
- ??
- ??
Quests
Moon Hunter Keep Map

Bosses
- Jailer Melitus
- Hedge Maze Guardian
- Mylenne Moon-Caller
- Archivist Ernarde
- Vykosa the Ascendant
Set Drop
NPCs in the area
- Adonatus Varian (Quest Giver)
Notable Items
- ?? Lorebooks
Enemies
- Archivist Ernarde
- Jailer Melitus
- Vykosa the Ascendant
- Ary and Zel
- Hulking Werewolf
- Moon Hunter Archers
- Moon Hunter Feral
- Vicious Dire Wolf
- Werewolf Berserker
 Anonymous
So many creatures can 1hit kill even the tank in this dungeon

 Anonymous
 Anonymous
***** this dungeon. Just ***** this one in particular. I haven’t felt such rage since Darkshade Caverns II. Don’t play this one, it’s not worth it. ***** this dungeon.

 Anonymous


Anyone else having an issue with Archivist Ernarde on vet. He enrages enemies outside his Aoe...
1
+10
-1