Fang Lair is a 4-player group dungeon located in Bangkorai in The Elder Scrolls Online. It is part of the Dragon Bones DLC. It features Normal and Veteran Modes. Players can use the Group & Activity Finder tool to easily find groups to tackle this dungeon with.
As of Update 17 (ESO patch 3.25), the last boss of the dungeon drops the Fang Lair Style motifs chapters, and all bosses in the dungeon drop the crafting material:Dragon Bone.
Fang Lair Veteran Walkthrough & Strategies
This is a challenging dungeon in Veteran modes. Players should form a well-geared party at endgame level.
"Deep within the belly of Fang Lair, an ancient Dwarven ruin, a master of necromancy works a dark ritual in an effort to reanimate the bones of a once-living dragon. It’s up to you and your companions to enter the dungeon, face the necromancers, and stop the ritual before this undead monstrosity can be unleashed on Tamriel"
Suggested group composition for Fang Lair
- 1 Tank
- 1 Dedicated Healer
- 2 DPS
Short summary of dungeon goes here.
You will also encounter challenging enemies that teach you game mechanics:
- Bone Colossi: When facing those enemies, the tank has to make sure to taunt it as soon as possible.Try to dodge it's attack instead of block, for it hurts badly even if you successffuly blocked it..
- Cadaverous Dire Wolf: Simple description
Lizabet Charnis
Level: CP 160
HP:
Strategy:
This boss will spawn few waves of mobs that you need to kill. The tank should taunts the small Colossus, for they can hit quite hard. The group should also be careful of the ice AoEs that the Ghosts will shoot around. You will also see Skulls that randomly fly into one direction, make sure to avoid them, otherwise you will get a lot of damage and be knocked down.
Mechanics:
- ??
- ??
- ??
Tank: ??
DPS: ??
Healer: ??
Cadaverous Bear
Level: CP 160
HP:
Strategy:
There is the Cadaverous Bear (Main Boss), Tiger and Guar (Two Mini Bosses) and 3 small Wolves (Small adds that explode). Each of the monsters here has a different attacks. The wolves will run up to players and then explode. They respawn quickly and keep coming back throughout the fight so keep moving or get ready to block their attack. The Wolves & Tiger can not be taunted, so a player who has aggro shouldn’t panic and stay close to the group.
Positioning for this fight: ??
Kill order: ??
Mechanics:
- ??
- ??
- ??
Tank: The tank should keeps the boss close to the guar and the rest of the group can just circle around the mainboss to kite the bomb Wolves.
DPS: ??
Healer: ??
Caluurion
Level: CP 160
HP:
Strategy:
This boss stays in the center of the room on top of a small hill. From there, it throws out a lot of AOE attacks, so get ready to dodge. After a while Caluurion will activate one of his relics that are located more towards the outside of the area. Depending on which totem gets activated, you will either get Poison AoE fields, Shockfields or add spawns. If a red ring forms around you, make sure not to overlap with a group member or you will accumulate extra damage. Once the relic is down, return to Caluurion.
Positioning for this fight: ??
Kill order: ??
Mechanics:
- ??
- ??
- ??
Tank: ??
DPS: ??
Healer: ??
Ulfnor and Sabina Cedus
Level: CP 160
HP:
Strategy:
This boss is accompanied by a ghost who will chain a random player. When you are chained, you won’t be able to free yourself or do anything. You can damage the ghost, once he reaches zero health the chains will break.
Positioning for this fight: ??
Kill order: ??
Mechanics:
- ??
- ??
- ??
Tank: The tank has to be careful, this boss's heavy attack hits for quite a lot.
DPS: ??
Healer: ??
Thurvokun and Orryn the Black
Level: CP 160
HP:
Strategy:
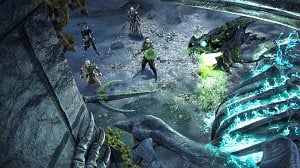
You will only be fighting the skeletal Dragon, the Necromancer will interact in the fight but he can not be damaged. Make sure your team has interrupt ability because the Necromancer will sometimes cast an attack that shoots skulls at players that deal a lot of damage, but it can be interrupted. DPS focus on Thurvokun and avoid his large poison AOE and ice attack that radiates from his tail. When his hp drops, crystals at the periphery of the room will become active and spawn additional mobs. Destroy the them ASAP.
Next phase, Orryn will summon a line of ghosts that will run across the room. They can kill you with one touch. In order to avoid this, hide behind the yellow glowing barrier created by the friendly NPC.
Orryn will resurrect Thurvokun once his HP drop to zero, it will come back with 50% hp this time. Occasionally, Thurvokun will scream and cause fear. Break free from this, but pay attention. After the fear attack, the dragon will shoot poison balls that can kill with one shot. To avoid this attack, look for a gold circle on the floor. Run through the circle (one per player) and you’ll be safe.
Positioning for this fight: ??
Kill order: ??
Mechanics:
- Necromancer Channel Attack: The Necromancer teleports into the battlefield and shoots skulls at players, this attack is interruptable.
- Shalk: the Skeletal Dragon raise his head and then spit on the ground,spawning one shalk.
- Poison Field: Thurvokun drop a small Poison AoE on the ground that will grow over time.
- Crystals: Once drop certain amount of HP, the Necromancer will activate one of the crystals on the edge of the area. destory the crystals ASAP or adds will keep spawning.
- Ghost waves pre-execute phase: The Necromancer will teleport to one of the sides of the area and summon ghosts. Use the barrier created by friendly NPC to protech yourselves.
- Thurvokun Poison Bomb: Thurvokun will walk towards one of the walls and scream, then he will walk up the wall. Use the yellow circles to break free from fear.
Tank: ??
DPS: ??
Healer: ??
Trivia
- Dungeon Gallery

Fang Lair Information
- Location: Bangkorai
- Suggested Level: CP 160
- Final Boss: Thurvokun and Orryn the Black
Achievements
- Fang Lair Vanquisher
- ??
- ??
- ??
Quests
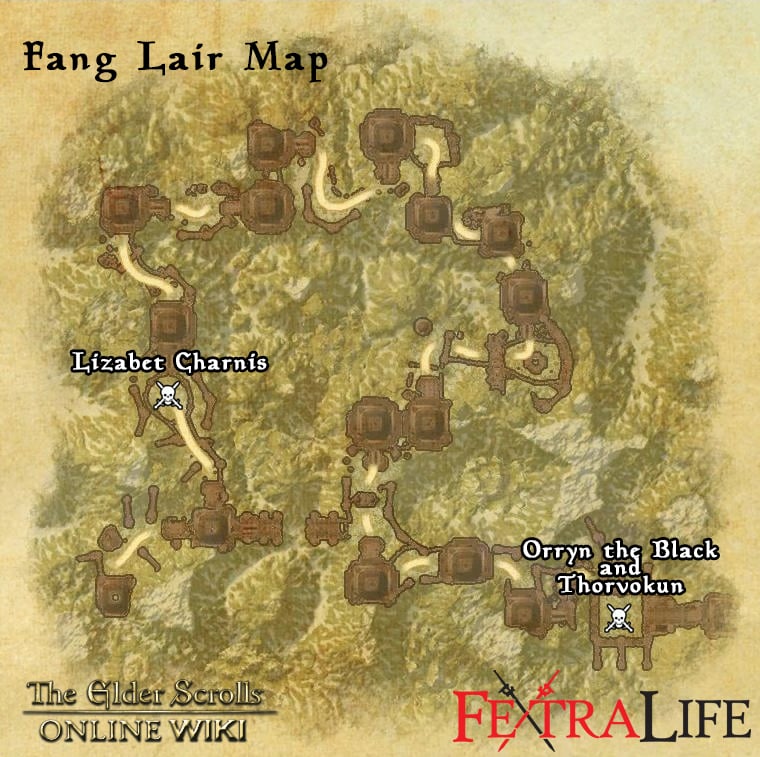
Fang Lair Map
Bosses
Set Drop
- Caluurion's Legacy (Light Armor)
- Trappings of Invigoration (Medium Armor)
- Ulfnor's Favor (Heavy Armor)
- Thurvokun Set
NPCs in the area
- ??
Notable Items
- ?? Lorebooks
Enemies
- Animus Crystals
- Bone Flayers
- Blackmarrow Ambushers
- Blackmarrow Deathmongers
- Blackmarrow Harvesters
- Blackmarrow Reanimators
- Blackmarrow Revivifiers
- Giant Scarabs
- Skeletal Thralls
- Wraith Thralls


Are the bosses only guaranteed to drop Dragon Bone in Vet mode? I've played it twice in normal mode, and got a total of one Dragon Bone.
1
+10
-1