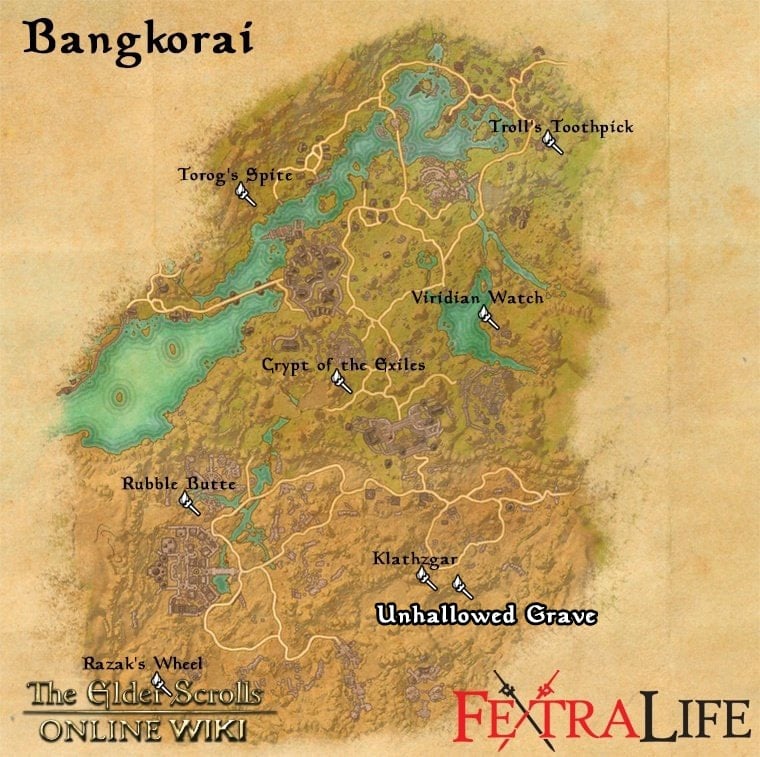
Unhallowed Grave is a 4-player group dungeon located in Hollow Wastes, Bangkorai in The Elder Scrolls Online (ESO). It is part of the Harrowstorm DLC. It features Normal and Veteran Modes. Players can use the Group & Activity Finder tool to easily find groups to tackle this dungeon with.
Unhallowed Grave is known to contain the remains of an unholy army called the Gray Host and according to Fennorian, the burial mound dates back to the First Era. The ancient fraternity of Pyre Watch keeps guard over the burial site but has recently been facing several attacks of Nord graverobbers who call themselves the Draugrkin. Shelaria, a Redguard guardian of the Pyre Watch, requests your assistance to investigate the site and drive off the troublemakers.
Unhallowed Grave Veteran Walkthrough & Strategies
This is a challenging dungeon in Veteran modes. Players should form a well-geared party at endgame level.
Suggested group composition for Unhallowed Grave
- Tank x 1
- DPS x 2
- Healer x 1
Objectives
- Explore the Unhallowed Grave
- Optional: Find a Grappling Bow
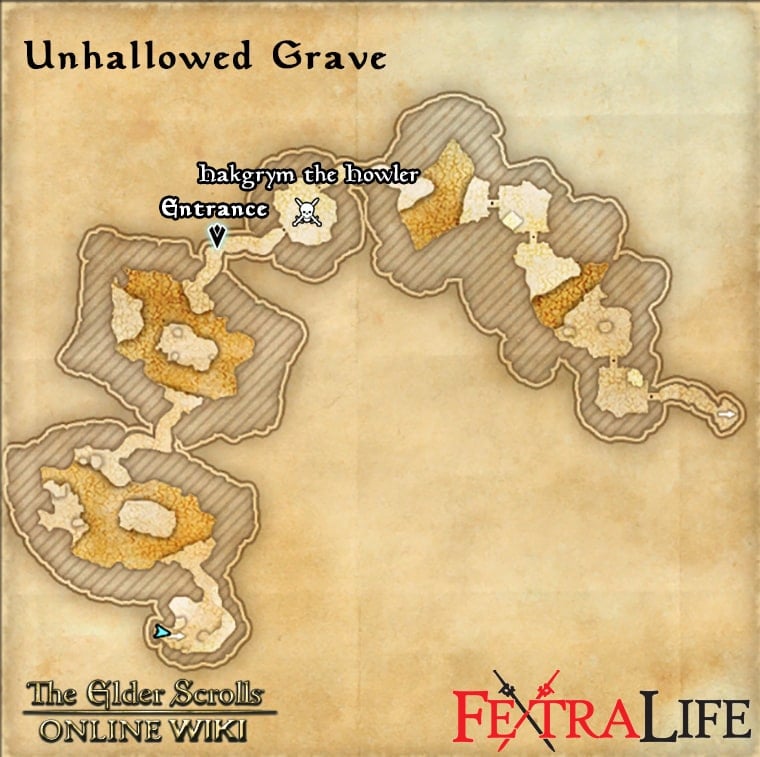
- Kill Hakgrym the Howler
- Continue Exploring the Unhallowed Grave
- Kill the Keeper of the Kilin
- Continue Exploring the Unhallowed Grave
- Kill the Eternal Aegis
- Continue Exploring the Unhallowed Grave
- Kill Ondagore the Mad
- Search for Kjalnar Tombskald
- Kill Kjalnar Tombskald
- Talk to Shelaria
Voria's Sanctum - Unhallowed Grave Secrets
There's a secret room called 'Voria's Sanctum" that lies within the unhallowed Grave. To enter it, you need to complete the following steps:
Step 1 Find Nabor the Forgotten
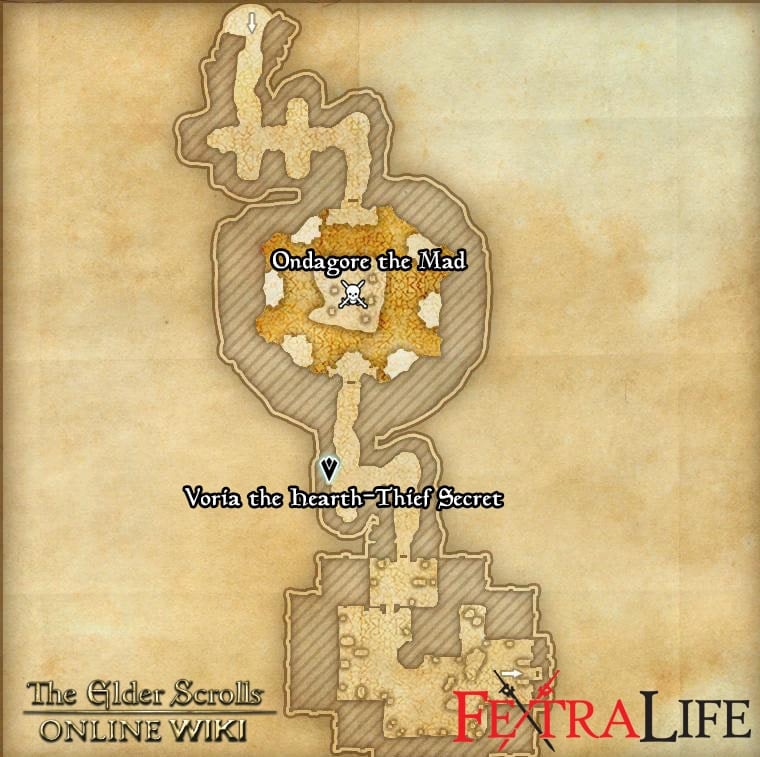
When you reach the location that is marked on the map above, you will hear a voice "You must find me, I suffer, please".
Find the entrance hidden in the shadow, follow the path and venturing forth. You will find yourself in a large room, now continue your way on the left side. Finally, you will reach a door and a hidden boss Nabor the Forgotten on a platform. Use your hook to reach him and defeat him.
After you defeated Nabor the Forgotten, the text will appear on the screen "Nabor's defeat has empowered a nearby artifact." Before heading out, interact with the glowing Unhallowed Urn to obtain a buff called "Forgotten Strength", this buff provides your character the following:
- Your grappling bow is empowered, damaging monsters in your path and near the post. It also reveals nearby grapple posts hidden by Voria.
- Weapon and Spell damage increased by 275.
- As a Necromancer, your Weapon and Spell Damage is increased by 325.
Step 2 Find Voria the Hearth-Thief
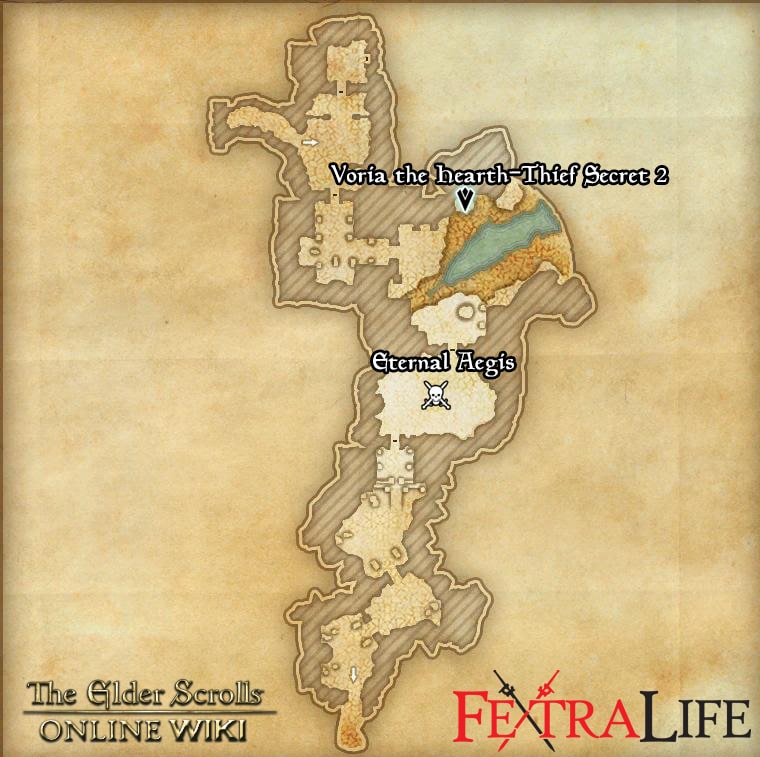
In front of Eternal Aegis Boss room, stand at the edge and look north, there's a hidden grappling hook across the cliff.
Keep using the grappling hook to venturing forth, a hidden boss Voria the Hearth-Thief can be found on the south side of the cliff. (The hook is in a big piece of stone.)
When you fight Voria, she will try to escape when her health drops below 75% and 40%. Catch her as fast as you can or you need to restart the dungeon to challenge her again.
Once defeated, touch the glowing artifact to get the new buff called “Voria’s Authority. The buff gives you the following effects:
- Grants the ability to break magical seals placed by Voria (which is the door that you couldn't open).
- Magicka and Stamina Recovery is increased by 3%.
- As a Necromancer your Magicka and Stamina Recovery is increased by 5%.
Step 3 Open the Voria's Sanctum Door
Now you can go back to Voria's Sanctum Door and find out what's hidden behind it.
A boss named Voria's Masterpiece waits you right after the sealed door, when you fight it, keep in mind that the swamp water causes damage and you can use grapple hooks to increase your mobility.
After you dealt with the boss, touch the artifact to acquire the third buff, Abominable Bulwark:
- Maximum Health increased by 2500 and reduces your damage taken by 3%.
- As a Necromancer, Maximum Health increased by 3250 and reduces your damage taken by 5%.
BOSS Hakgrym the Howler
HP: 4,060,124

Strategy: Hakgrym the Howler will be the first boss you'll face in this dungeon. Fighting Hakgrym from a distance is best since he uses physical attacks where he swings his sword and charges up for a devastating heavy attack. Whenever he uses a heavy attack, he stands in place and puts his weapon behind him then charges in for that heavy swing, you can easily dodge it or if you have enough health, you can also block it, so try to keep your distance or have one of your team members who is playing a tank to keep aggro on the boss so that the others can focus on damaging him.

One of Hakgrym's ability is summoning crystals and totems. While you are fighting him, Hakgrym will assemble a crystal that emerges from the ground where you are standing. This is an AoE attack that will explode once the circle fills up, just simply dodge away from the AoE to avoid getting hit.

What you need to watch out for is the Woeful Totem that appears at the edge of the area, if you see a totem is summoned, make sure to kill it quickly to stop it from shooting multiple projectiles that inflict a lot of damage if it is ignored.

Next, if Hakgrym's health is at 60%-70%, he will teleport onto one of the creatures that are bound and will unleash a Flesh Abomination. It is quite slow and you can get behind it to avoid getting hit while attacking it simultaneously, just watch out for its AoE attack where it raises its blunt hand and slams it onto the ground which deals AoE damage. make sure to stay out of its range by moving away or dodging, and keep your distance since the impact of the AoE will cause a field that will remain on the ground - there are two of these creatures, so shift your focus and prioritize on killing it and also watch out for Hakgrym's attacks.
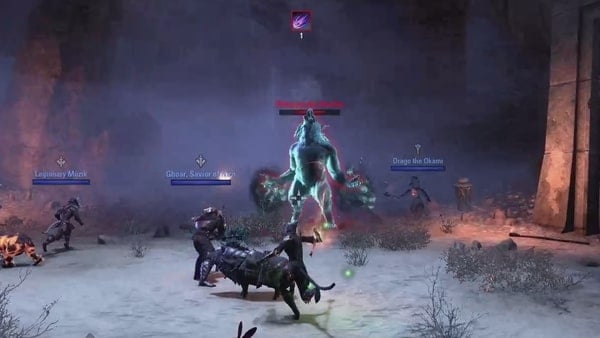
Once he reaches 0% health, Hakgrym will transform into a werewolf and gain back 50% of his health. While he is in this form, he will be in a frenzied state which allows him to charge forward and skeletons will also appear in the area who will help him, try to kill the summoned enemies first then the boss so that you can focus on his movements and attacks. He'll still have the ability to summon the crystals and totems, so watch out for those. Apart from that, his attacks are quite the same where he slashes forward twice, uses a heavy attack. However, he will have another AoE attack where he collects energy from his hands and slams it on the ground which causes a lot of damage. You can easily avoid this by moving away or dodging out of the circle of the AoE attack. He also stops his foot on the ground which causes a shockwave that moves along the area in all directions - just keep moving to avoid his attacks and focus on attacking until he is defeated.
BOSS Keeper of the Kiln
HP: 4,511,248

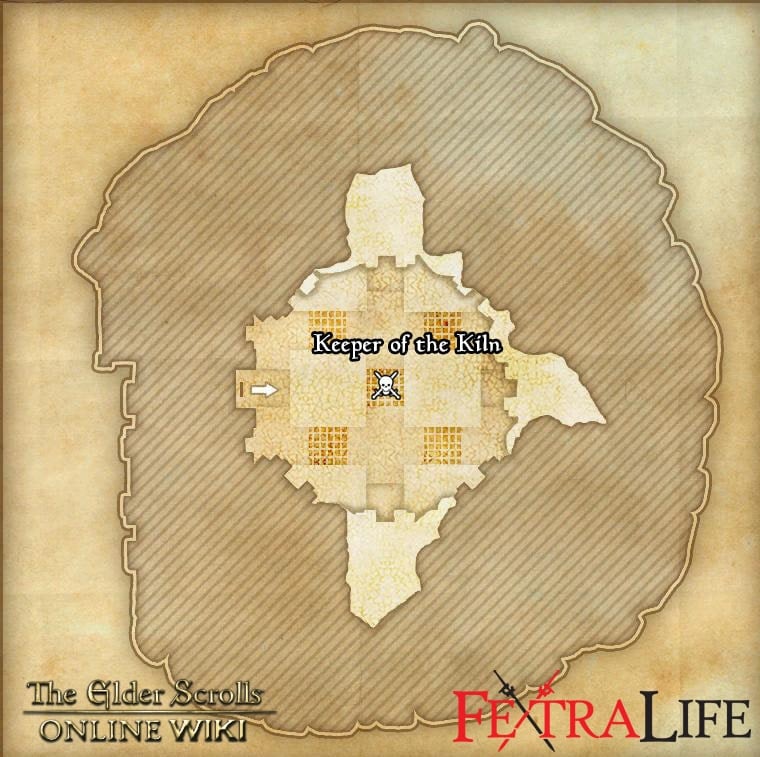
Strategy: The second boss you'll encounter in this dungeon is the Keeper of the Kiln, this boss will have allies who will help fight such as archers and swordsmen, just keep the tank to aggro the boss so that the other members of your team can keep inflicting damage. The Keeper of the Kiln's swings its sword to attack but it will have the ability to conjure a red shield around it which triggers a mini-puzzle/boss mechanic.

Once you see a red force field around the boss and also the notification "Flames are rising in the vents!" immediately look up and you'll see a post that you can grapple on. At this point, it is recommended for the tank to remain on the ground to distract the boss, while the other tree to grapple onto the upper left, right, and middle sides.

You'll have to activate the Sigil of the Forgotten and check the number of nodes that are lit, it could either be from 1 to 4 nodes, now, for example, if it's four nodes that have been activated.

The boss needs to step onto the sigil that has four nodes below, activate it from above, then have the tank or whoever is on the ground draw out the boss onto the sigil with the corresponding nodes and wait for it to plunge its sword on the ground with the sigil for the flames and its shield to disappear. Repeat the process to avoid the flames to fill in the area and have one of your team to focus on watching out for the archers to avoid it from dealing with an AoE damage of arrows.
BOSS Eternal Aegis
HP: 3,542,594

Strategy: Eternal Aegis will be the third boss you'll face for this dungeon, this boss only has a couple of attacks and can be dealt with easily. First, it has a heavy attack that deals damage and causes a knockback, it telegraphs this attack by crossing its front arms and placing its weapon from behind before it swings it forward, this can be dodged or blocked if you have enough health, just be careful of it since it can nearly kill anyone who is hit.

Second, two AoE attacks. The first one is where it throws it swords in both direction and returns back to the boss like a boomerang, you'll usually know if it will execute this attack if it spawns a clone of itself before throwing the swords. Use the gaps in between the circles to avoid getting hit. The second AoE attack is when it conjures a blue wave around it like a hurricane that blocks any attacks, its area is around the boss and will follow you for a short period of time, this also deals damage if you are caught within the field. However, you can avoid this if you keep yourself close to the boss since there's a gap that you can move around if you are inside the blue field, if you find yourself outside of the blue field, just keep moving until it disappears.
BOSS Ondagore the Mad
HP: 6,014,998

Strategy: Ondagore the Mad will be the third boss before facing the final boss. Once the battle starts, the outside section of the area will be inaccessible and filled with poison that can kill you if you grapple onto it, Ondagore has quite low damage but makes up for it by summoning wraiths and by its mini-mechanic.

At some point, Ondagore will store energy and you'll see a poison field around him that will eventually surround the inner section, once you see this, immediately grapple to the outer section of the are to avoid getting hit by the poison. When you're safe, grapple around the outer section and kill the Skeletal Arcanists, once you've killed them all, the poison around Ondagore will disperse back to the outer section, so grapple back to the inner section to avoid getting hit.

When he reaches 50% health, Ondagore will store energy, he'll begin to glow white and a green colored field will start to engulf the inner section trapping you inside. When this happens, immediately hide behind one of the pillars for cover and to avoid getting hit by a white pulse that can kill you in one shot. What you'll need to do is work your way around, hide behind the pillars, and kill the (4) Menders that are providing him the energy. After you've killed all four, the green-colored field will disappear and Ondagore will rever back to its original form. The skeleton will be in the area for the rest of the battle until you defeat Ondagore.
BOSS Kjalnar Tombskald
HP: 17’961’984 Mio

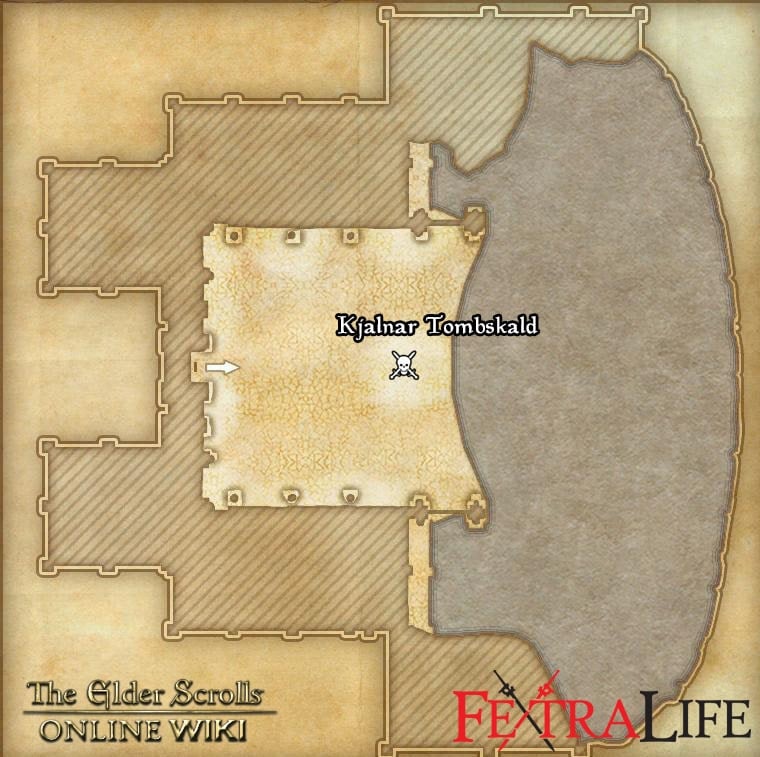
Strategy: The final boss for this dungeon will be Kjalnar Tombskald. Kjalnar's physical attack is similar to Hakgrym the Howler, the first boss encountered. He will run towards you and swing his sword twice and will sometimes charge up for a heavy attack that inflicts a huge amount of damage and stun, it can be avoided by dodging or blocking if you have enough health. It is recommended to have the tank aggro the boss so whoever is playing the tank can take most of the damage for the team and the rest can focus on continuously attacking.

For his special attacks, you'll notice that he will charge up and a circle will appear underneath him. After storing enough energy, he will spin in the air and throw out multiple bone-like knives that will remain on the ground for a short while. You can easily avoid it by dodging away from Kjalnar and do not step onto the knives that are on the ground since it will explode and inflict snare if you accidentally walk over it.
Another of his abilities is when he summons multiple skeletons in the area, he'll telegraph this ability when he stands in place and a blue flame is wrapped around his hand. He'll eventually, shoot it up in the air and you'll notice the flames will disperse to the edge of the area. Make sure to have the DPS members follow it and kill the Skeletons immediately since you'll need to stop them from using projectile attacks as well as the rest to head towards the sigils that are at the center of the area, if a skeleton makes it to one of the sigils, it'll empower the boss.

Once the boss reaches 50% health, Kjalnar will teleport to the edge of the area and he'll summon a giant skeleton that shoots out fireballs and causes the AoE to be engulfed with flames. It cannot be damaged, so focus on attacking Kjalnar. Another attack the giant skeleton will do is a frost breath, you can avoid getting a chunk of damage by blocking or putting up a shield - so keep moving around the area to avoid getting hit by its fireball attack and once it starts to breathe in, prepare to block or put up a shield to defend yourself from the frost breath attack.
Rewards
- Head Marking: Bloodrune Face Markings -- Knock Knock Achievement
- Body Marking: Bloodrune Body Markings -- Unhallowed Grave Conqueror Achievement
- Title: Sanctifier -- Skull Smasher Achievement
- Title: Bonecaller's Bane -- In Defiance of Death Achievement
- Emote: Wickerman Mishap -- Harrowstorm Explorer Achievement
- Dye: Frozen Blood -- Harrowstorm Delver Achievement
Trivia
- Dungeon Gallery
Information
- Location: Bangkorai
- Suggested Level: Max
- Final Boss: Kjalnar Tombskald
Achievements
- Harrow Explorer
- Harrow Scout
- Unhallowed Grave Vanquisher
- Knock Knock
- Ceramic Panic
- Shattered Shields
- Last-Second Sundering
- Skeletal Shutout
- Unhallowed Grave Challenger
- In Defiance of Death
- Skull Smasher
- Grave Robber
- Unscathed Grave
- Draugrkin Slayer
- Bone Colossus Slayer
- Relentless Dogcatcher
- Mender Wrender
- Unchecked Empowerment
Quests
Unhallowed Grave Map
Bosses
- Eternal Aegis
- Hakgrym the Howler
- Keeper of the Kiln
- Kjalnar Tombskald
- Ondagore the Mad
Set Drop
NPCs in the area
- Fennorian
- Shelaria
Notable Items
- ??
Enemies
- Draugrkin graverobbers
- Bone Colossus
 Anonymous
 Anonymous


Bored to death with ESO
0
+18
-1