Black Drake Villa is a 4-player group dungeon located in the northern Gold Coast, with the entrance east of the Dark Brotherhood Sanctuary in The Elder Scrolls Online (ESO). It is part of the Flames of Ambition DLC. It features Normal and Veteran Modes. Players can use the Group & Activity Finder tool to easily find groups to tackle this dungeon with.
Black Drake Villa Guide including all Black Drake Villa Sets, Boss Mechanics, and group role recommendations for Tank, DPS, and Healer.
Tucked away in the northern Gold Coast sits an abandoned villa built as a retreat for former Emperor Durcorach, the Black Drake. Rumors tell of a vast library deep below that holds knowledge pillaged from across Tamriel. Hired by a mysterious benefactor, Eveli Sharp-Arrow arrives in search of a valuable book and a little adventure, but she soon discovers someone has set fire to the underground archive. Join Eveli in a race to find the book and defeat the forces behind the consuming blaze.
Black Drake Villa Veteran Walkthrough & Strategies
This is a challenging dungeon in Veteran mode. Players should form a well-geared party at endgame level. Please consult our Endgame Guides page for tips on endgame progession, gearing, etc.
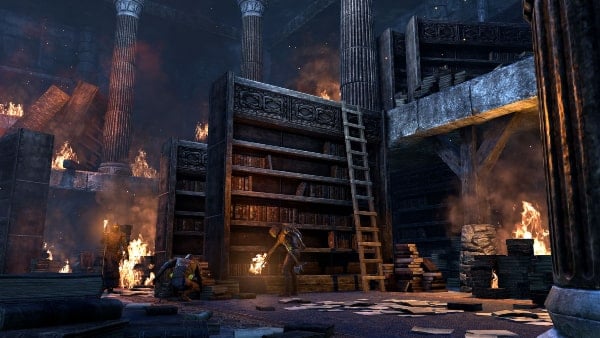
Black Drake Villa is a fire-themed dungeon that consists of three large main areas and four boss chambers with plenty of trash mobs in between. The dungeon contains 3 main bosses as well as 4 secret bosses that require some exploration and puzzle-solving to find. Defeating the secret bosses isn't required to complete the dungeon, but they present the players with extra challenges and loot. Please see the Secret Bosses section of this page for a guide on how to find them. Each of the main bosses also have a Hard Mode that can be activated by raising the Challenge Banner found in their respective boss chambers, usually next to the entrance.
Suggested group composition for Black Drake Villa:
- 1 Tank
- 2 DPS
- 1 Healer
Objectives:
- Dungeon: Black Drake Villa - Enter Black Drake Villa and retrieve the mysterious book
- Quest: Burning Secrets - Recover a book from an abandoned villa before it is burned to the ground
- Quest: Pledge: Black Drake Villa - Prove you are truly Undaunted by clearing Black Drake Villa
The dungeon also employs two special mechanics to aid the players throughout:
Avatar Fragment
These are wisps found throughout the dungeon. When you approach them, they may jolt around and move to a different location. Collecting these fragments are the key to unlocking the final secret boss. Additionally, the buffs granted by defeating the first three secret bosses are improved the more fragments you collect.
Ice Avatar Transformation
Delving further into the dungeon, you may come across large plates on the ground with a glyph carved onto them. These are Ice Avatar synergy plates which become active if you have 150 Ultimate Energy available. Activating the synergy consumes your ultimate and transforms you into a powerful Ice Avatar, temporarily granting you the following bonuses:
- Increased Health, Stamina and Magicka
- Increased movement speed
- Immunity to crowd control effects
Additionally, you are granted use of the Whiteout synergy, freezing all enemies in place for a short duration as well as healing and reviving dead allies instantly. This powerful ability will also work on bosses and is invaluable in Hard Mode where you can get overwhelmed by mechanics. Finally, if you collect an Avatar Fragment whilst transformed into an Avatar, you will summon a Frostkin to fight alongside you for a short duration. Note that there is at least one Avatar Synergy plate in each of the main bosses' chambers so use this powerful form if you are having trouble dealing with the encounters.
Black Drake Villa Main Boss Guide
Kinras Ironeye
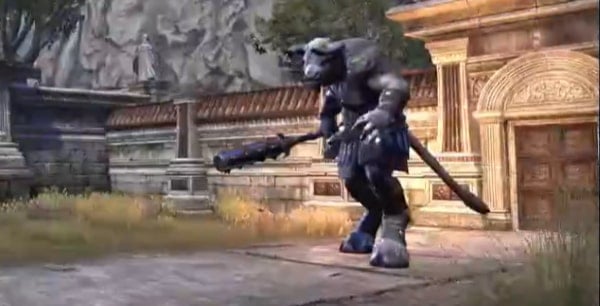
Kinras Ironeye is the first main boss encounter of Black Drake Villa. He is a Minotaur that fights with a large spiked mace and utilizes many fire-based attacks. Kinras will also command the salamanders that spawn to empower him, boosting his damage output for all attacks.
HP: 4.81 M
Hard Mode HP: 9.14 M
Boss Attacks & Mechanics:
Kinras will begin the fight armed with his mace and will have an unarmed phase twice at roughly 75% and 30% Health respectively. He uses certain attacks only during his unarmed phase, which will be marked below. Note that most of his other mechanics are in play regardless of his unarmed state.
- Light Attack - A standard swing that deals light to moderate damage. Leaves an AoE patch on the ground that the tank needs to move out of. If unarmed, Kinras tosses fireballs at his target instead.
- Heavy Attack - The boss holds his club to his right side and channels a heavy upward swing that deals a hefty amount of damage and knocks the target down. If unarmed, Kinras charges up a heavy fireball attack instead. Block these attacks or dodge roll if the boss is empowered.
- Triple Fire - Kinras throws out a 3-pronged fire attack that slides across the floor in the direction the boss is facing.
- Fire Grates - There are metal grates all across either side of the room which will periodically spew out a large flame in front of them, dealing moderate fire damage to players caught in range.
- Blazing Salamanders - These adds spawn from the grates every time they shoot out flames. The salamanders have a flaming aura around them which grants a damage buff to their allies, including Fiery Totems and Kinras himself. If you have frost avatar active, you can heavy attack or cast synergy to turn salamanders into frosty ones, which will debuff enemies in its aura instead.
- Roar - Kinras calls the salamanders towards him. Interrupt this attack immediately. If left to continue, the salamanders' flaming aura will empower the boss, granting him increased damage for all his attacks.
- Fiery Totem - The boss tosses a totem that repeatedly spits fireballs at the entire group until destroyed.
- Volcanic Smash [Hard Mode Only] - Kinras will charge up an overhead smash with his mace, creating a small volcano where it hits the ground. The volcano will continue to spew magma at the group. The tank will need to stand in this and block to prevent damage to the party.
- Phase Shift - Kinras throws his mace to a corner of the room and it continually spawns flaming orbs that roam around dealing damage on contact. Kinras will fight unarmed until he reaches a certain HP threshold (Around 50% for the first instance and 20% for the second), or after some time has passed. He will then rush to pick his weapon back up. During his unarmed phase, he has access to the following attacks:
- Rock Spikes - Kinras pummels the ground three times causing rock spikes to jut out of the ground three times, one after the other. This attack targets two random players, including the tank. Keep moving if you are targeted, but watch out for your teammates.
- Fiery Fissures - Kinras targets a random player, waves his arms and pulls up a large spiky fissure from under the target's feet which deals heavy damage to players caught within. This fissure will persist for quite a while.
- Geyser Burst [Hard Mode Only] - Kinras will periodically raise his arm and summon a small geyser at a random spot. After a short arming period, it causes a fiery explosion in a small radius around it, dealing heavy damage to players caught in the blast.
- Fiery Chains [Hard Mode Only] - He channels a chain that shackles a random party member, preventing them from moving or attacking. This can be interrupted. This is usually followed up with a Geyser Burst regardless if the attack was interrupted or not.
Strategy:
- The fight with Kinras Ironeye involves a lot of overlapping AoEs and roaming damaging effects. Players will need to be constantly on the move while the tank tries to keep Kinras in one spot as consistently as possible.
- Tanking & Positioning
- Face Kinras away from the group at all times. Doing this will eliminate group damage from his two main AoEs: The fire patches from his light attacks and the Triple Fire that forks outwards.
- Keep careful watch of the side grates which shoot a jet of flames when the salamanders spawn in. The flames will reach up to the middle of the room so it's best to move to the other side until the flames cease.
- After his unarmed phases, Kinras will rush to his weapon's location, usually on the opposite side from where you were tanking him. This can be disorienting but simply close the distance and reposition him.
- DPS & Healer Duties
- Fiery Totems should be prioritized by the DPS as they deal a lot damage to the whole group in a very short time if left alive for too long. Futhermore, they can be buffed by the salamanders.
- The salamanders should be snared if possible. The boss will periodically roar to call the salamanders towards him, making them move faster. Upon touching their aura, all his attacks are buffed and deal significantly more damage. The tank will be taking extra damage at this point. Interrupt the roar when you see it. The salamanders may roam on their own towards the general direction of the boss anyway, but it's best to ensure they take as long a time to reach him as possible.
- Watch out for the ground pound that sends Rock Spikes out from under players. This attack hits two players three times each and is easily side stepped but try not to drag the AoEs onto your teammates.
- Hard Mode
- On Hard Mode, prioritize the Salamanders over the Fiery Totems.
- Players should also be on the lookout for his Fiery Chains on Hard Mode, which should be interrupted as he will follow it up with a hard-hitting Geyser Burst. He can also cast this on the tank so the rest of the group should be ready with their interrupts.
- Another mechanic to watch out for in Hard Mode is the Volcanic Smash that he does periodically when equipped with his mace. The tank should be quick in standing in the volcano and soaking up the projectiles for the group.
- General Tips
- There is an Avatar Synergy plate in the room that you can use to gain the upper hand if the mechanics prove too overwhelming. Whiteout will freeze even the boss, interrupting all attacks regardless if they are interruptible or not.
Captain Geminus
Captain Geminus serves as the second boss encounter of Black Drake Villa. She is a ranger captain and fights with a bow and daggers while utilizing a lot of lightning-based skills. She also creates shades of herself regularly to harass the group.
HP: 4.51 M
Hard Mode HP: 10.15 M
Boss Attacks & Mechanics:
- Light Attack - A standard arrow shot that deals light to moderate damage. Uses a dagger if in melee range.
- Heavy Attack - Geminus infuses her daggers with lightning and performs a flourish that hits for heavy damage. Block or dodge out of this attack.
- Lightning Orbs - Targets a random party member and shoots three lightning orbs that fork outwards towards the target.
- Lightning Mines - The boss throws several mines at random locations. These explode on contact and deal moderate damage. These mines persist for a long time but you can safely dodge roll through them without triggering them.
- Teleport Stomp - The boss will teleport to a random player and immediately follow-up with a stomp that deals devastating damage in a massive radius around her while knocking players back. This attack will decimate non-tanks and should be dodge rolled out of. Geminus will occasionally forgo the teleport entirely and go right into the stomp.
- Shade of Geminus - Geminus summons up to four copies of herself at the outer edges of the room. These adds don't move but channel a lightning-based attack at a random party member which culminates in a lightning blast that deals tremendous amounts of damage if left uninterrupted. This is telegraphed by a marker around the player and an orb of lightning forming on the shade's bow.
- Invulnerability Phase - When the boss is reduced to about 70% health, she teleports to the center of the room and becomes invulnerable. She will then repeatedly send flames flowing outward from her in four directions per wave. These flames explode on contact, dealing moderate damage. She will also summon Shades and an Air Atronach which must be defeated to end the phase. This phase will repeat at roughly 30% health. Geminus sends out six flames per wave during the second invulnerability phase.
- Air Atronach - Summoned during the boss' shielded phase. This add performs standard melee attacks with its swords and a heavy double slash which should be blocked. The atronach will also target a random party member and channel lightning from its swords dealing moderate damage.
- Fillet - Geminus charges up a knife throw which hits in a cone targeted at the tank. She immediately follows this up with a much larger fan of knives that hits devastating amounts of damage. She will use this move periodically after the first invulnerability phase.
- True-Sworn Flame Hound - Summoned periodically after the first shielded phase. These adds do standard melee and ranged fireball attacks. They also throw fireballs high in the air which leave patches of flames on the ground where they land.
Strategy & Player Roles:
- Tanking & Positioning
- Keep Geminus faced away from the rest of the group at all times.
- During the invulnerability phases, a good strategy is for the tank to stack the Air Atronach on one shade and have the group AoE them down while moving from shade to shade to maximize efficiency. Just remember to interrupt the shades when they're channeling the lightning blast attack.
- Shortly after the first shielded phase, Geminus will start using her Fillet attack. The tank should pick the boss up immediately and bring her to a spot between any active shades while picking up any summoned hounds, being careful with positioning as the boss' Fillet attacks can one-shot any non-tanks. This attack latches onto the tank's position and fires after a short delay. The tank should make sure they are positioned right in front of the boss where the cone is narrowest to make it easier to avoid and reposition for the follow-up. Better geared tanks can likely get away with blocking the damage but keep in mind this can take a toll on your healer so avoidance is always advisable.
- Look out for the hound adds and try to pull them towards the boss to have your DPS cleave them down easily.
- DPS & Healer Duties
- The party should be spread out generously around the arena to make it easier to avoid the boss' Teleport Stomp, which is her most devastating move, especially on Hard Mode. Proper positioning will also help with getting to the shades for interrupts when they spawn. It may be a good idea to bring Crushing Shock, Venom Arrow and other ranged interrupts for this fight.
- DPS should prioritize shades and interrupts while watching their positioning to ensure they don't trigger the mines.
- General Tips
- Remember that there is an Ice Avatar synergy plate in the room that you can use if your group is having trouble dealing with the adds. A well-timed Whiteout can also cancel Geminus' most dangerous moves like the Fan of Knives or Teleport Stomp.
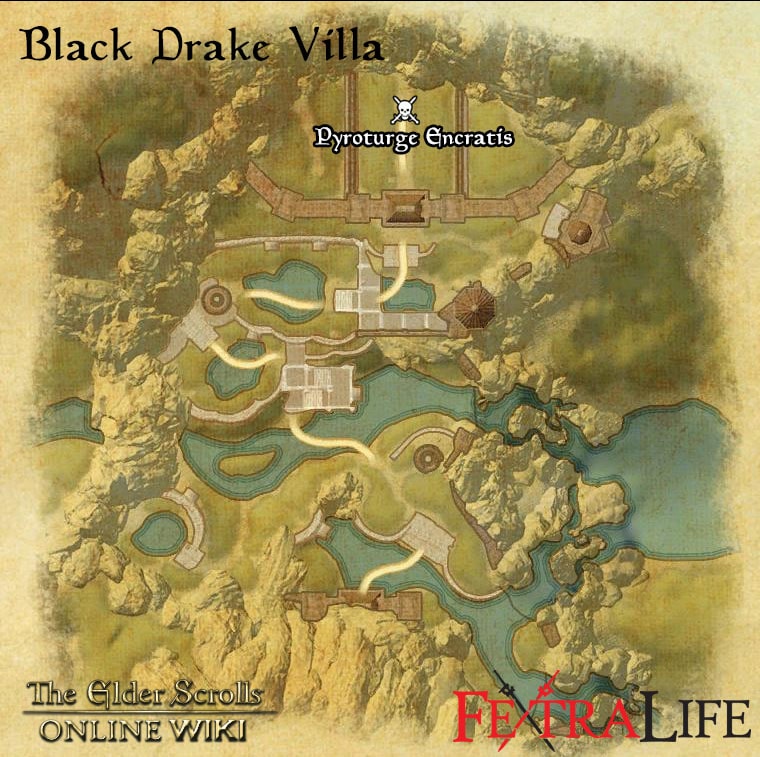
Pyroturge Encratis
Pyroturge Encratis is the main final boss of Black Drake Villa. He is a humanoid fighter that primarily uses unarmed melee attacks and fiery spells. He will periodically engulf the entire room in flames, leaving just a small patch as a safezone. During his second phase, Encratis gains an entire moveset that makes him even more dangerous.
HP: 4.7M
Hard Mode HP: 9.5M
Boss Mechanics:
- Phase One - The boss encounter will occur in two phases. During the first phase, he is fought in a courtyard area with dragon head statues all across either side of the room.
- Light Attack - Standard fiery punches at melee range or thrown fireballs if at range. Deals moderate damage.
- Heavy Attack - A spinning kick that deals moderate to heavy damage. This attack should be blocked.
- Flaming Vortex - Encratis surrounds himself in fire vortex that deals continuous damage.
- Burning Specter - Encratis summons two Burning Specters during the Flaming Vortex. These adds cannot be taunted and float towards random party members, dealing basic claw swipes that deal moderate damage. On [Hard Mode], four specters are summoned per vortex.
- Salamander Flame - The boss channels a flaming breath-like attack that hits for light damage over time. The flames morph into salamanders that crawl across the floor in an irregular pattern. Several of these salamanders will lock onto players at random, crawling towards them and then exploding after a short arming animation. The salamanders cannot be attacked and will die on their own after exploding.
- Firestorm - Encratis channels a room-wide Firestorm, activating the dragon head statues and engulfing the entire room in fire, leaving only the eye of the storm as the safezone. On [Hard Mode], some of the dragon heads will remain active for a while longer after Encratis is done channeling, leaving the areas directly in front of them unsafe.
- Fire Behemoth - Summoned during Firestorm. These giant monstrosities wield sledgehammers and perform standard attacks. Their heavy attack is a spinning smash that deals heavy damage and culminates in a Firestar AoE effect falling from the sky and splitting into several stars on impact.
- Phase Two - At about 70% health, Encratis will teleport to the back of the room, summoning a meteor shower to break open the wall and then head into his inner lair. Phase two will see you fight the boss in a large circular arena with an upper, outer ring platform containing dragon head statues all around, as well as a bottom pit in the center full of Grotto Salamanders and geyser jump pads that can get you back on the upper platform. Encratis will retain most of his moves from Phase One while also gaining additional/modified abilities:
- Heartsfire Blade - Encratis conjures a flaming sword, replacing his unarmed moveset:
- Light Attack - A quick stab that deals moderate damage and leaves Heartsfire Inferno patches on the ground. These patches deal moderate to heavy damage.
- Heartsfire Spear - Encratis pulls his sword up to his shoulder and then sends it flying forward, dealing massive damage to his initial target and then bursting into a cone of fire that hits behind the target. This attack needs to be blocked. Encratis reverts to unarmed state after this move.
- Firestorm - The boss will periodically teleport across the upper ring and immediately follow up with Firestorm, engulfing the whole upper ring in flames except for a small circle directly around the boss. The lower pit in the middle is also a safe area. On [Hard Mode], the areas directly in front of some dragon head statues will remain unsafe for a while longer after Encratis is done channeling, just as in the previous phase.
- Heartsfire Blade - Encratis conjures a flaming sword, replacing his unarmed moveset:
Strategy & Player Roles:
- Tanking & Positioning
- During Phase One, tanking Encratis dead center of the room ensures enough space for players to maneuver out of his many AoEs. Face him away to prevent splash damage from the flame breath but beware of the exploding salamanders.
- When he engulfs the entire room in flames, move into the center quickly and taunt the behemoth immediately as it can one-shot the rest of the group with its heavy attacks. Position him right next to Encratis for easy cleaving.
- During Phase Two, be extra aware of positioning as the boss will drop quite a lot of AoEs on the ground while he has his sword equipped. You will be forced to move a lot but try to keep him faced away from the group at all times. His Heavy Attack will decimate non-tanks and even yourself if you don't block it.
- DPS & Healer Duties
- Phase One should have the group spread generously around Encratis but never in front of him.
- When Encratis starts breathing flames at the tank, watch out for the salamanders that will charge towards random players. They take a second to arm and are easily avoidable but deal a lot of damage in a small radius. Don't drag your salamanders to your teammates!
- DPS should keep watch of the Burning Specters and try not to let them live for too long. Their damage can rack up swiftly if more than 3 are active at once.
- The healer needs to focus hard on the tank whenever Encratis equips his sword as the tank will take a lot of incoming damage.
- General Tips
- During Phase Two, Encratis will periodically teleport across to the other side of the ring and begin channeling Firestorm. Everyone needs to head into the pit and use the geysers to get back up onto the platform. Make sure you pick the geyser that leads into the eye of the storm and that the tank is the first back on the platform as there will be a behemoth waiting with Encratis.
- There are plenty of Grotto Salamanders that will keep respawning inside the pit. These don't need to be killed and only serve as a minor nuisance whenever players drop down blow. Encratis and his adds will never drop into the pit but they will bombard you with ranged attacks from the platform.
- There is an Ice Avatar Synergy plate in the courtyard area, as well as the upper ring in phase two which can help take care of the Burning Specters in one hit of Whiteout.
Black Drake Villa Secret Boss Guide
Black Drake Villa has four secret bosses hidden all around the dungeon. These are the Avatars of Zeal, Vigor and Fortitude, and the final boss Sentinel Aksalaz. Finding each boss requires some puzzle solving involving pressure plates, levers and Guardian Orbs. These are large glowing orbs placed on bowl-like receptacles found in the inner areas of the dungeon. The Guardian Orb puzzles usually require you to complete a set of four in order to open a secret entrance.
As noted in this guide, the Avatar Fragments are tied to the secret bosses in a big way as players will need to collect 30 fragments each for a total of 120 Avatar Fragments in order to unlock the boss fight for Sentinel Aksalaz. Defeating each of the Avatar bosses will generate two fragments in their caves and cause additional fragments to spawn in the main areas outside their chambers. Be sure to explore preceding areas thoroughly, including the main boss chambers after defeating an avatar.
Moreover, defeating each of the Avatar bosses will grant a powerful buff that persists through your current run of the dungeon. Each buff is also improved further by the amount of Avatar Fragments as follows:
- Avatar of Zeal
- Echo of Zeal - Weapon and Spell Damage increased by 50.
- Improved by Avatar Fragments up to a maximum of 350.
- Avatar of Vigor
- Echo of Vigor - Stamina and Magicka Recovery increased by 200.
- Improved by Avatar Fragments up to a maximum of 500.
- Avatar of Fortitude
- Echo of Fortitude - Maximum Health increased by 500.
- Improved by Avatar Fragments up to a maximum of 3500.
Avatar of Zeal
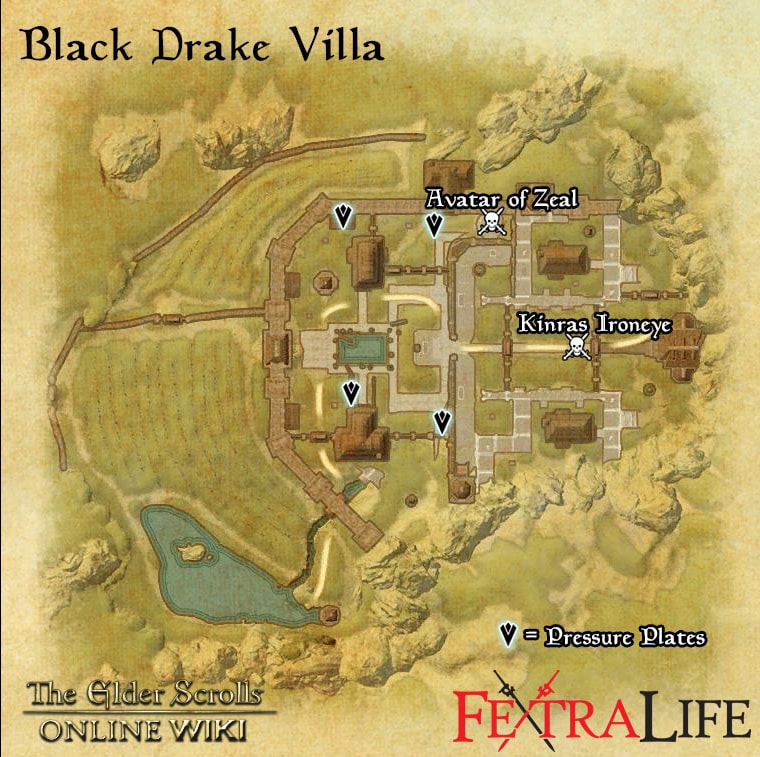
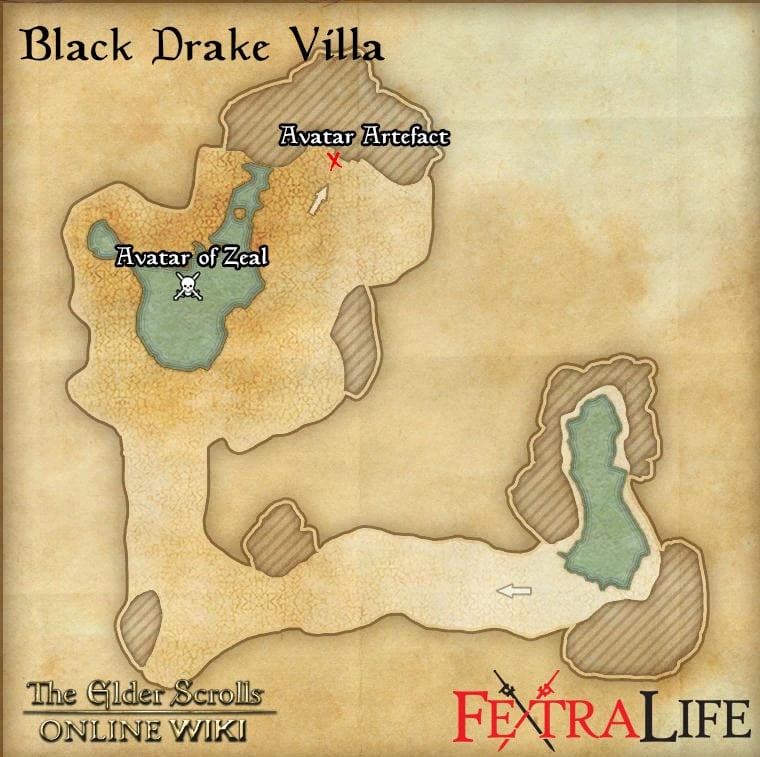
This boss is available immediately after entering the Estate Grounds, the very first area of Black Drake Villa. It's a good idea to clear the area of trash mobs beforehand. Located around the map are four pressure plates, one for each player to stand on. Doing this will unlock a hatch located a little further ahead from the northeast pressure plate:
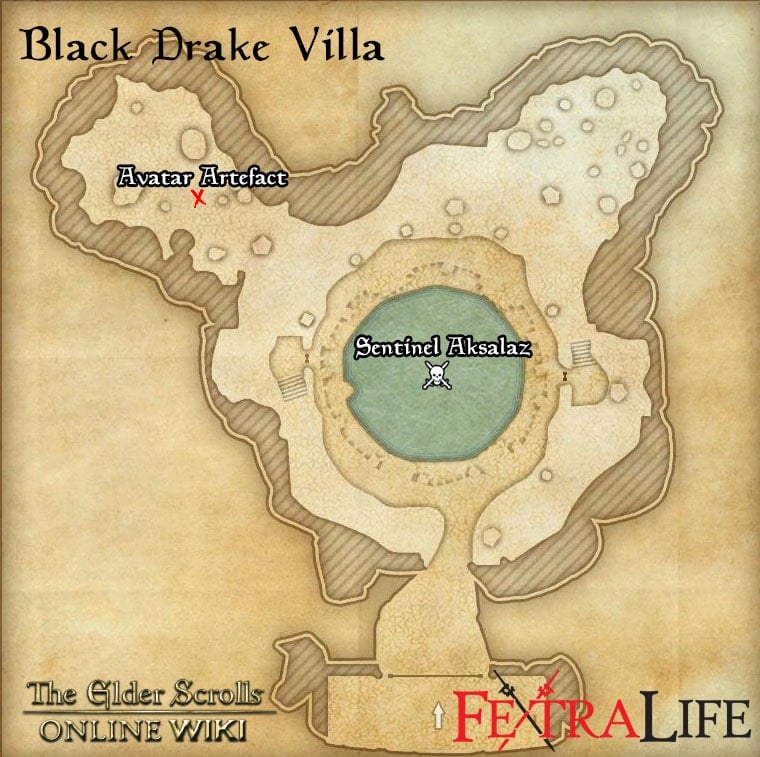
Head down the hatch and follow the cave all the way. At the end, you will find a large stone monolith called an Avatar Artefact. Activate this to begin the boss encounter.
![]()
The Avatar fights are more akin to mini-bosses than full-on boss encounters. They feature minimal mechanics and are not overly dangerous, but players should take note anyway as they make appearances during the final secret boss encounter. The Avatar of Zeal is a special Indrik opponent that uses ice-based attacks and spells.
HP: 2.5 M
Boss Mechanics & Strategies:
- Rapid Frost - Fires a frost beam from its horn dealing moderate damage. This attack will fork onto all players in the Avatar's line of sight. Simply face it away from the group at all times to prevent this.
- Spectral Indrik - The avatar rears up and fires several spectral indriks at the party which stun players. Easily side-stepped.
- Freezing Vortex - Places an icy vortex on a random party member that deals damage in a small radius around the target. This shouldn't be a problem as long as the group is spread about generously.
- Teleport - Teleports to a random party member. The tank should close the distance shortly after the teleport and reposition the avatar.
Avatar of Vigor
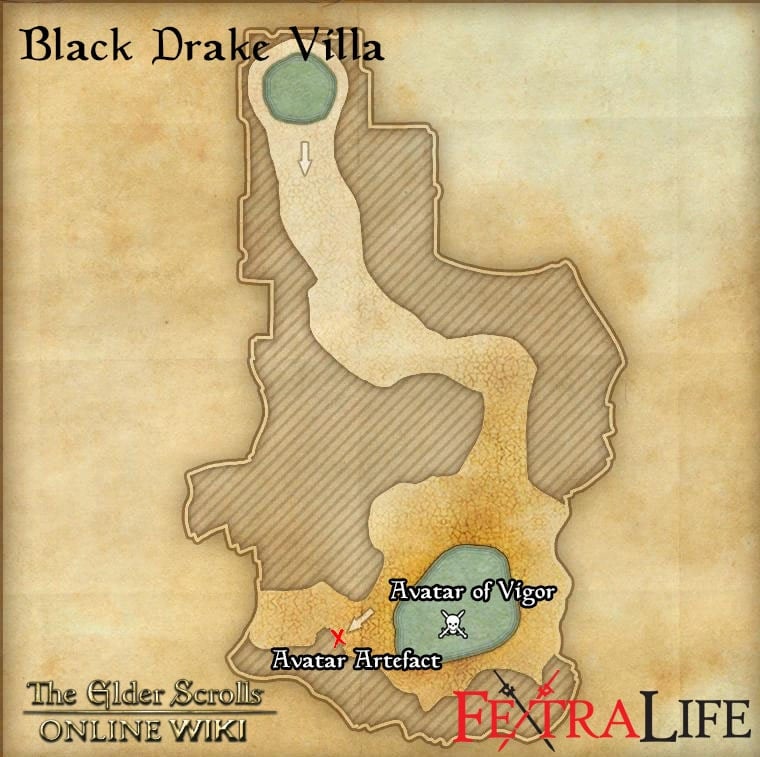
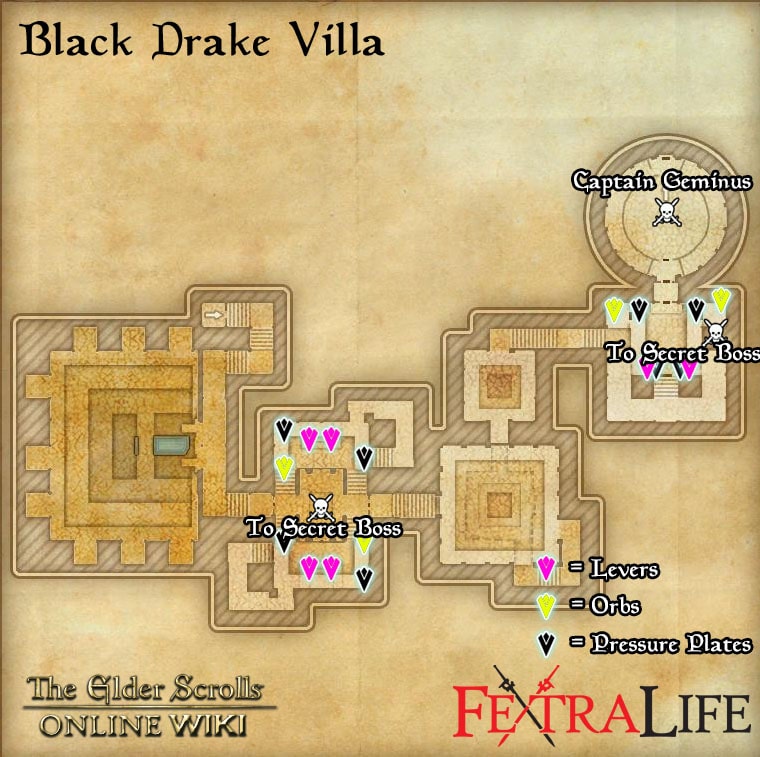
The next Avatar is available shortly after beating Kinras Ironeye and entering the Grand Archive. After fighting your way through the first area, you will come across a room with four statues. Two of the statues will have glowing orbs in front of them. These are the Guardian Orbs. The other two will have empty bowls. You will need to find the remaining orbs to uncover the secret cave.
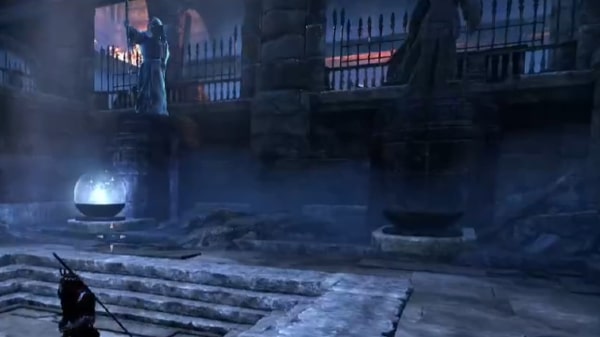
Near the entrance to this room are a set of stairs on either side. Your group should split into two pairs, taking each side. The areas above are identical on both sides and require the same process to proceed. You will find a couple of levers and a locked gate to the side. Have two players pull on the levers simultaneously and enter the now unlocked gates. Upstairs, you will find a set of burning book cases and another set on the other side of the area. Look for the pressure plates in front of these book cases. Have both players stand on both to uncover the Guardian orb nearby.
Pick up the orbs from both sides and bring them back into the central room. Place both orbs in the empty bowls and a pathway in the very center of the room should open up. Jump down and follow the cave to the end, activating the monolith to begin the boss encounter.
![]()
The Avatar of Vigor follows the similar tank and spank mechanics as the previous avatar. Simply keep her turned away and block her heavy attack.
HP: 2.07M
Boss Mechanics:
- Light Attack - The avatar throws frostbolts at her target that deal light to moderate damage.
- Heavy Attack - The avatar raises her hands up high, forming a crystal above her. After charging, she shoots the crystal at her target. This attack locks onto her target and can only be blocked, not dodged.
- Geysers - The Avatar drops to the floor and causes three geysers to form on the ground before erupting and dealing moderate damage to players in range. These should be easy enough to avoid as long as the group pays attention.
Avatar of Fortitude
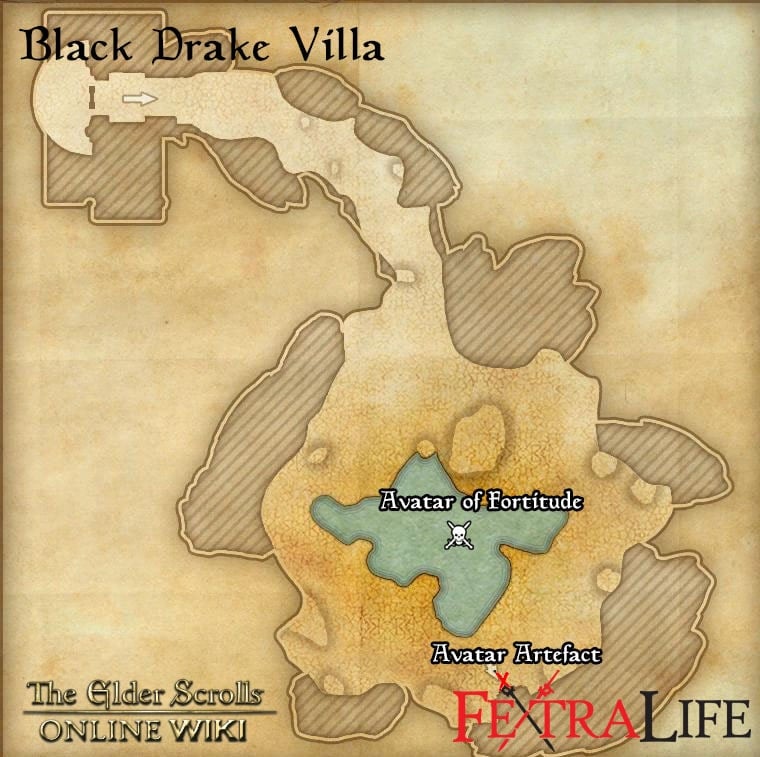
The final Avatar is found just before the Captain Geminus boss fight. Right before her chamber is a large room with two statues and a locked gate on the opposite side. In front of the locked gate are two pressure plates and two levers. Pull on the levers simultaneously to unlock the gate. This gate leads up to pathways to the balconies on either side of the statue room.
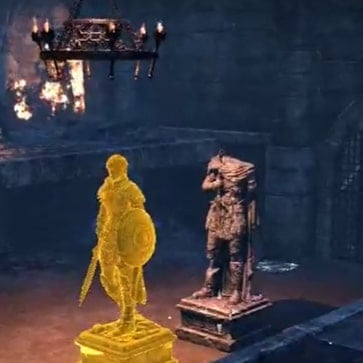
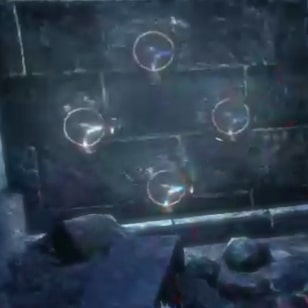
Again, split up into groups of two and take the path to each balcony. At the end of each balcony is a small locked room containing an orb. In front of the gate is a pressure plate. Have one person stand on each pressure plate. This should cause the statues to light up and if you look at the wall on the entrance side of the balcony, there should be some strange pads that have become active. These will allow you to control the statues. Have the other person use the controls to move the statues below onto the pressure plates by the first gate. This will unlock the gates on the balconies, allowing your team to pick up the orbs. Bring the orbs down to the main floor and place them in the empty bowls next to the bookcase. This will uncover the secret pathway behind the bookcase leading up to the boss.
![]()
The Avatar of Fortitude is a souped up version of a Frost Atronach. It uses primarily melee attacks and the fight plays out pretty much the same as the other avatars.
HP: 2.5M
Boss Mechanics:
- Light Attack - A quick jab with its pointed right hand.
- Heavy Attack - A charged backhand smash with its left arm that deals heavy damage. Block to mitigate the damage.
- Homing Projectiles - The boss rears back and shoots homing projectiles repeatedly at the whole party. Block to mitigate the damage as the damage can rack up quite a bit. Note that this attack takes a long time to arm and the avatar is basically vulnerable for a few seconds before it starts shooting.
Sentinel Aksalaz
This boss has several requirements in order to unlock:
- All main bosses must be defeated
- First three secret bosses must be defeated
- Each party member must collect 30 Avatar Fragments each for a total of 120 fragments. Killing the first three secret bosses should make this fairly easy as they each cause more wisps to spawn around the main areas outside their secret caves.
When all three conditions are met, find the Avatar Artefact in the final boss chamber where you fought Pyroturge Encratis. It's in the northwest corner of the room, up some steps from the arena's outer ring.
There are four orb receptacles to the sides of the Artefact and this is where those fragments come in. Have each player examine the Avatar Artefact to deposit your fragments. Every 30 fragments deposited spawns an orb in each receptacle. Once all four receptacles are filled, the boss spawns in the middle pit of the arena.
[Boss img]
Sentinel Aksalaz
Warning: You have four attempts on Sentinel Aksalaz per run. Otherwise, he leaves and you will need to run the entire dungeon again for another chance at beating him so make sure your party is well prepared and you've gone over the mechanics and specific roles of each player.
HP: 6.4M (Sentinel Aksalaz); 1.03 M (Avatars)
Hard Mode HP: 16 M (Sentinel Aksalaz); 1.9 M (Avatars)
Boss Mechanics:
- Light Attack - Standard axe swings which deal quite a hefty amount of damage, especially on [Hard Mode].
- Heavy Attack - A charged swing. The boss rears back, holding his axe under his left side. Hits very hard, but is blockable.
- Jumping Spinning Slash - Aksalaz does a quick leap, landing with a frost-infused spinning slash. On [Hard Mode], this inflicts
- Icicle Slash - The boss slashes in a wide arc, sending three icicles that fork outward in a cone.
- Frostkin - Summoned by the boss periodically throughout the fight. Not very dangerous but having more than 3 active can become overwhelming.
- Ground Icicles - The boss plunges his axe head into the ground and summons Icicle Spikes from the ground that follow each player. This attack summons a total of 3 spikes consecutively per player. Keep moving to avoid each spike.
- Frost Nova - The boss teleports to the middle of the room and summons tornados that move along the outer ring. He then charges up a room-wide nova for which the only safe area is in the outer edges, in between the moving tornados.
- Avatar Summon Phase - At certain points in the fight, the boss will summon the first three secret bosses beginning with the Avatar of Zeal when he hits 85% HP, followed by the Avatar of Vigor at 60% and the Avatar of Fortitude at 35%. Each avatar has 1.03M HP and 1.9M HP in Hard Mode. Each avatar retains their moves from their individual fights but will need to be tanked and fought together with the boss.
- Final Phase - At 25% HP, the boss will shrink the arena, covering the outer edges with a persistent icicle storm. The safe zone will continually shrink as he loses health. Additionally, the grates surrounding the arena will begin firing ice projectiles that split into three and travel across the room, much like the boss' own Icicle Slash move minus the Frostbite DoT.
Boss Hard Mode Additional Mechanics:
- Jumping Spinning Slash - On Hard Mode, this inflicts a Frostbite DoT effect that can kill the tank in a very short time if not healed. Dodge roll out of this when possible.
- Icicle Slash - On Hard Mode, this attack inflicts a Frostbite DoT on the target.
- Frostbite DoT - A Damage-Over-Time effect inflicted by the Jumping Spinning Slash and Icicle Slash moves above. Deals a ton of damage over 8 seconds. Avoid getting hit by those moves as much as possible.
- Comet Drop - The boss rears back and waves his hand to channel a spell. When the channeling is complete, a comet drops on each targeted player dealing damage in a circle around them. This is telegraphed by icy smoke emanating from each targeted player, at which point they should move away from the rest. As the fight goes on, the boss will target more players, making coordination extremely important to prevent stacking damage.
Strategy:
- The boss should be tanked in the middle of the room and faced away from the rest of the group. This ensures plenty of maneuverability during the many overlapping mechanics that will take place over the course of the fight. Being in the center also makes it easier for the tank to pull the Frostkin that the boss summons periodically.
- The rest of the party should position themselves such that there's plenty of space between each party member as they will need to move a lot during the Ground Icicles move.
- When the boss moves into the center, each player must rush to the outer edge, in between tornados and follow them as they move along the edge. Getting hit by a tornado will throw you into the danger zone near the middle while briefly stunning you. The Frost Nova the boss casts hits very hard and will freeze you in place for a short duration.
- For the Avatar phases, it's best to stack the boss on the avatar and face both of them away from the group. The currently active avatar should be focused down while avoiding all the AoE effects from the main boss. The Avatar of Zeal will fire a beam from its head which forks over to any players in its line of sight. It will also send its spectral indrik projectiles which can be side stepped easily. The Avatar of Vigor is pretty straightforward but watch out when the geyser overlaps with other ground effects like the boss' Ground Icicles. The Avatar of Fortitude's homing attacks will need to be blocked or healed through and its charged attack blocked.
- During the final phase, watch out for the ice waves from the grates. Keep the boss centered, especially as the arena gets smaller and smaller.
Hard Mode Strategy:
- Hard Mode for Sentinel Aksalaz is activated by defeating Pyroturge Encratis on Hard Mode.
- For Hard Mode, pay special attention to the additional mechanics present, particularly the Frostbite DoT that the boss now inflicts on the tank. This DoT can hit for upwards of 15k per second so avoid the associated skills and don't try to block or soak them. For this reason, it's advised to have a dedicated healer focusing on the tank in case avoiding the DoT attacks proves too difficult.
- The boss will now periodically drop comets on random party members. As soon as you see smoke emanating from your character, you should position yourself so as not to have other players get caught in your comet's AoE. This is particularly important in the final phase when there is barely any safezone left and each player gets targeted by a comet. Everyone should spread at the very edge, leaving just enough space so that no comet stacks on anyone.
Defeating Sentinel Aksalaz will reward you with 2 chests of additional loot, or 3 on hard mode. Among the possible rewards is the Relic of the Sentinel, an item that you can use in subsequent runs of Black Drake Villa to reveal hidden treasure, providing even more chances at additional loot.
Black Drake Villa Rewards
- Unidentified Black Drake Villa Armaments
- Undaunted Key
- +1 Skill Point
- Relic of the Sentinel
- Dye: Scintillating Scarlet (Flames of Ambition Delver Achievement)
- Memento: Illusory Salamander Stone (Black Drake Villa Conqueror Achievement)
- Title: Ardent Bibliophile (Ardent Bibliophile Achievement)
- Title: Flame Chaser (Snuffed Out Achievement)
Black Drake Villa Trivia
- Dungeon Gallery
Information
- Location: Gold Coast
- Suggested Level: Max
- Final Boss: Pyroturge Encratis
Achievements
- Amphibians Arrested
- Ardent Bibliophile
- Black Drake Villa Challenger
- Black Drake Villa Conqueror
- Black Drake Villa Vanquisher
- Breaking Ranks
- Bullseye!
- Eviction Notice
- Flame Beast Slayer
- Flames of Ambition Delver
- Flames of Ambition Explorer
- Flames of Ambition Scout
- Salley-Oop
- Shake It Up
- Snuffed Out
- Speed Reader
- True Sworn Slayer
- Unsigned
Quests
Black Drake Villa Map
Bosses
Secret Bosses
Set Drop
Notable Items
Lorebooks:
- TBC
Others:
NPCs in the area
Enemies

