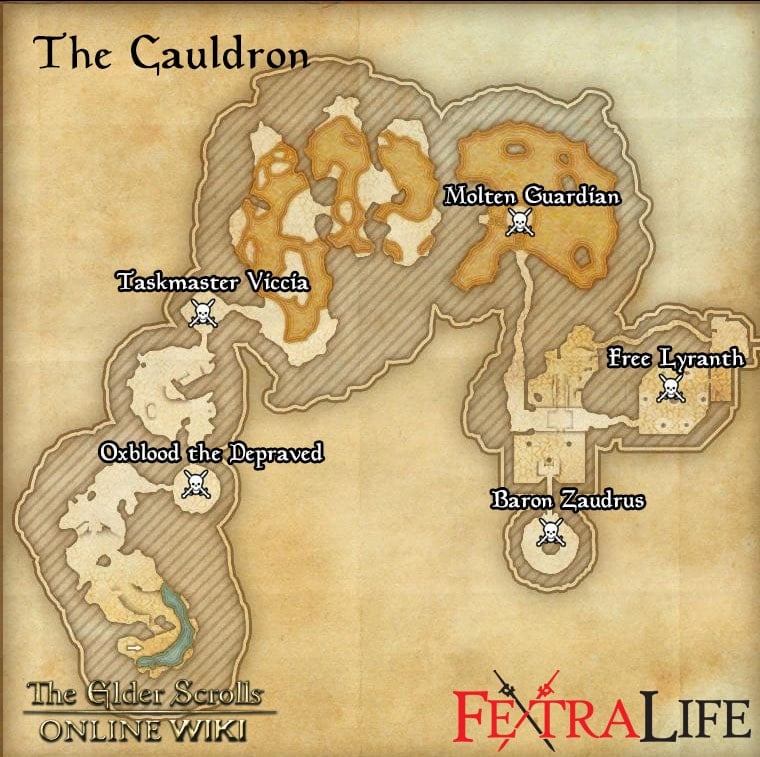
The Cauldron is a 4-player group dungeon located in western Deshaan, west of the West Narsis Wayshrine in The Elder Scrolls Online (ESO). It is part of the Flames of Ambition DLC. It features Normal and Veteran Modes. Players can use the Group & Activity Finder tool to easily find groups to tackle this dungeon with.
The Cauldron Guide including all The Cauldron Sets, Boss Mechanics, and group role recommendations for Tank, DPS, and Healer.
Long-forgotten ritual sites and ruins of the past fill the mountains of western Deshaan and serve as enticing sources of power for devious forces. When the citizens of a quiet Dark Elf village start to go missing, all eyes turn to the sinister cult residing in a nearby abandoned mine. Delve deep underground to rescue the kidnapped people and stop a dark ritual before it can unleash destruction.
The Cauldron Veteran Walkthrough & Strategies
This is a challenging dungeon in Veteran mode. Players should form a well-geared party at endgame level. Please consult our Endgame Guides page for tips on endgame progression, gearing, etc.
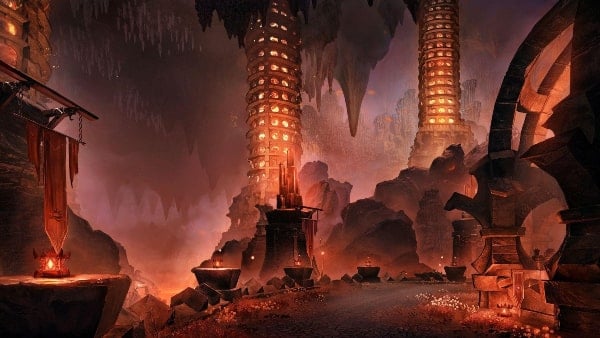
Dungeon description
Suggested group composition for The Cauldron
- Tank x 1
- DPS x 2
- Healer x 1
Objectives:
- Dungeon: The Cauldron - Descend into the Cauldron and rescue the Dark Elf Captives
- Quest: Into the Deep - Help Lyranth recover a map from a group of cultists
- Quest: Pledge: The Cauldron - Prove you are truly Undaunted by clearing The Cauldron
The Cauldron Walkthrough
Oxblood the Depraved
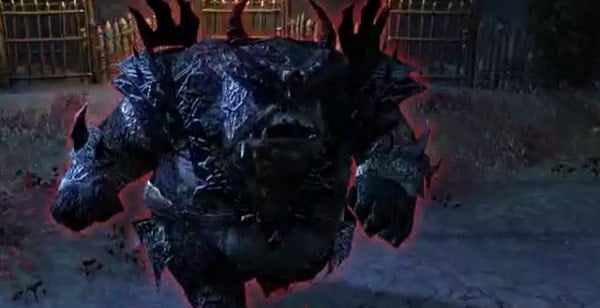
Oxblood the Depraved is an Orgrim-type enemy that serves as the first boss of The Cauldron. He predominantly uses poison-based attacks and can cage players, taking them away from the fight temporarily.
HP: 5.3M
Boss Mechanics:
- Light Attack - A quick backhanded swipe with his right hand.
- Heavy Attack - The boss raises both arms, charging up a hard-hitting smash with both hands. This move should be blocked to stagger the boss.
- Toxic Flatulence - The boss turns around and releases three poison clouds from his rear end that travel outward to the edge of the room in a triangle formation. The clouds deal heavy poison damage.
- Exploding Chains - Oxblood summons a chain under each player which explodes after a short delay, and then repeats the attack twice in succession. Deals major damage if the explosion connects. Keep moving and sidestep each chain that appears and be aware of your teammates' positioning to prevent stacked damage.
- Summon Globs - The boss turns away for a second and then expels several Glob adds from his mouth to the outer edge of the room. The green Bile Globs slowly crawl toward the boss while the red Gore Globs spit projectiles at the party from afar. These need to be destroyed before the boss can make use of them.
- Poison Cage - The boss will entrap a random party member in a poisonous cage. The target is unable to move or act and takes damage over time until freed. The cage will need to be destroyed by other party members.
- Consume Glob - The boss runs over to a nearby Glob and eats it. The green Bile Globs will heal him while the red Gore Globs will enrage him, granting him a damage buff. Enrage is signified by the boss' glowing red eyes.
- Charge - When enraged, the boss will charge at a random party member, dealing a devastating amount of damage to non-tanks and knocking the target down. Watch out for this move and be prepared to dodge roll.
Strategy:
- The boss needs to be tanked in the center of the arena in order for the party to have enough room to maneuver around the fart clouds and maximize the distance the Bile Globs have to travel to get to the boss. Facing him away from the group is not too important as he doesn't have any damaging cleaves or cones.
- For the exploding chains, simply keep moving as they lock in place shortly before exploding, giving you enough time move out of the way of the explosion radius. Watch out for the consecutive chains that follow each explosion and try not to overlap with your teammates.
- Watch out for team members getting getting caged and call for help as the poison damage can kill a trapped player rather quickly.
- The globs are best dealt with as soon as they spawn to prevent any chance of the boss healing or enraging.
Taskmaster Viccia
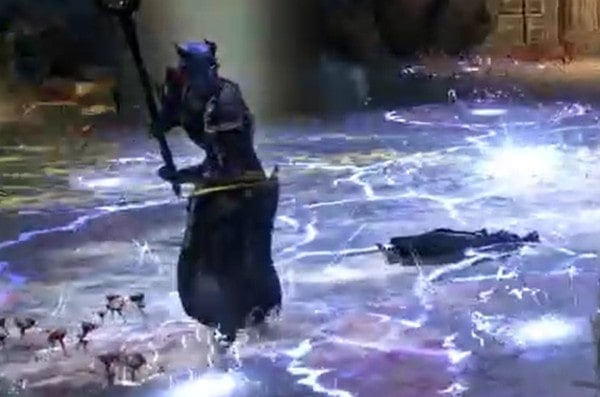
Taskmaster Viccia is the second boss of The Cauldron. She is a powerful Xivilai sorceress that utilizes lightning-based magic and is assisted by her Dremora companions throughout the fight.
HP: 5.3M
Boss Mechanics:
- Light Attack - The boss attacks with a standard melee swing of her staff.
- Heavy Attack - The boss pulls her staff to her left side and charges an upward swing dealing heavy damage. This should be blocked or dodge rolled.
- Lightning Mines - Viccia raises her staff and summons four lightning mines that detonate on proximity, dealing shock damage and stunning any player caught in the explosion. You can safely roll through the mines without triggering them. These mines persist throughout the fight and will only be removed through explosion or if Viccia summons replacements in the general vicinity. As such, the room can get filled by these so watch out.
- Ground Lightning - The boss charges her staff with energy and performs a spinning ground smash, dealing heavy damage and knocking down players caught in the blast. The attack also leaves a large circle of electricity on the ground in the blast radius which persists for 10 seconds and deals persistent damage to players who step inside. Players should dodge out of the danger zone as soon as she charges up and the tank should pull her away from the circle immediately after.
- Channeled Lightning - The boss targets a random party member and begins charging a devastating lightning attack from her staff. This attack should be interrupted.
- Adds Spawn - From about 75% HP, adds will begin spawning periodically from the openings at the edge of the room. These consist of Dremora Torturers, a standard archer-type enemy and Dremora Slavers, mage-types that like to summon shades of themselves.
Strategy:
- Because the boss will frequently summon mines and electrify a large patch of the ground, it's important to reposition her constantly to allow for the damage dealers to get to her while avoiding the all the hazards on the floor.
- While the adds are typically not a big threat, they can rack up in numbers quickly if left alone, especially with the slaver's summoned shades. Be careful not to get overwhelmed. The tank should constantly be pulling the adds to him and the boss for easy cleave damage.
Molten Guardian
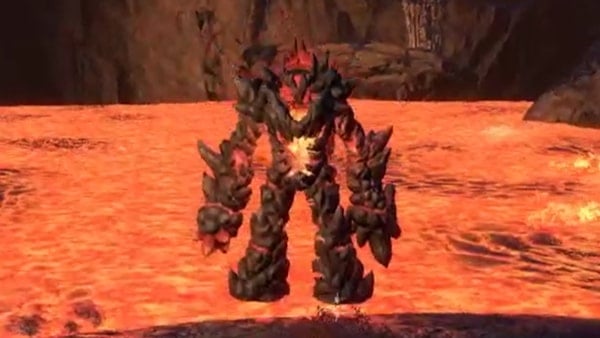
Molten Guardian is an Iron Atronach type enemy, serving as the third boss of the Cauldron. It utilizes magma attacks and frequently relocates around the arena.
HP: 4.5M
Boss Mechanics:
- Light Attack - The boss splashes some lava in a small cone in front of him. If at range, the boss throws fireballs instead.
- Heavy Attack - The boss rears back, charging a ground punch with its left arm that knocks players down on impact and leaves a puddle of lava that deals major damage over time if you remain in it. The knockdown can be blocked but the attack will leave a puddle regardless. The puddle persists for about 10 seconds.
- Flame Volley - The boss leans back and releases about a dozen flaming projectiles from his chest that leave small flaming patches all over the arena that persist for quite a while.
- Channeled Blast - The boss sinks his right arm into the ground and causes flames to burst at each player's location. This attack should be interrupted.
- Relocation - The boss sinks into the lava and swims along the edges of the island to reappear on another side. Occasionally, the boss will travel directly under the island and through to the opposite side, causing three ground flame AoEs to fork outward in an irregular fashion. This deals damage but there's plenty of safe space between the forks.
- Nova Smash - The boss sticks his chest out briefly and then raises both hands for a powerful ground smash that causes a large flaming explosion with massive radius. Prepare to dodge out of this move.
- Summon Adds - Two Molten Fiends are summoned typically when the boss sinks into the lava to relocate. These will stay to his sides and are easily cleaved with the boss. They're not very dangerous and seem to only throw fireballs at players.
Strategy:
- The Molten Guardian is fought in a large lake of lava with an island in the middle where the players stand. The boss stays in the lava on the edge of the island and does not move except to relocate to a different side of the island from time to time.
- Because the Guardian's main attack hits in a cone and he likes to leave puddles in front of him, it's best to tank him to the side at an angle while melee damage dealers position to his side and a little to the back. This will prevent unnecessary splash damage.
- Be careful of the lava pool from his heavy attack as it can kill you in a matter of seconds.
- The adds don't deal much damage and can easily be cleaved along with the boss.
Free Lyranth (Encounter)
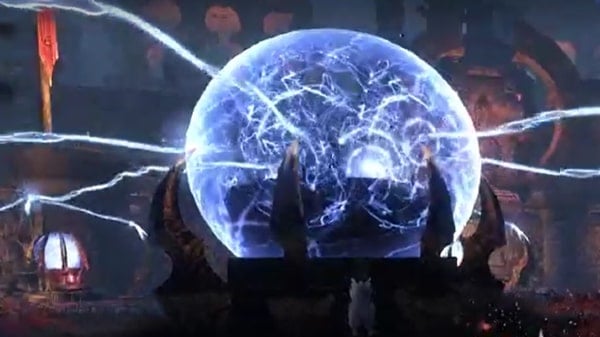
The Free Lyranth encounter is less of a boss fight and more of a rescue operation while fighting through waves of enemies. Shortly before the Molten Guardian fight, Lyranth is captured by Baron Zaudrus. You later find her in a large courtyard area, imprisoned within a magical barrier in the center. The barrier device is powered by six energy pylons spread around the outer edges of the room. You must find a way to rescue her.
Strategy:
- You can begin the encounter by attacking the cultists loitering around the barrier. This first wave of enemies consist of a couple of Scamps, Dremora Skullguards and Dremora Gandrakyns.
- After defeating the first wave, your ally Drathas will find a bottle of Daedric Catalyst Fluid, a highly flammable substance that he throws on the ground. Lyranth is able to cast a fireball spell from within the barrier but it has very limited range. Have one player collect the oil and draw a line from one of the pylons to the magical barrier device in the center. From here, Lyranth will be able to ignite the oil and destroy the pylon. Note that she can destroy two pylons at once by having the oil carrier draw a line from a pylon, to the barrier and then to the pylon closest to the first.
- Once two pylons are destroyed, another wave of enemies is unleashed. This wave will consist of Flame Colossi, Flame Atronachs, Scorching Orgrims, Xivilai Ravagers, Xivilai Toxicators, more Scamps and Armored Daedroths. Drathas will find another bottle of oil shortly during the second wave of enemies. If your group isn't struggling with the enemies, you can have one player draw the oil lines to destroy the other pylons while the rest are fighting. Be careful not to get overwhelmed.
- Once the last pair of pylons are destroyed, a final wave is summoned which will include a Flame Titan that throws a lot of AoEs on the ground.
- Note that any destroyed pylons will periodically discharge some electricity which travels along the ground at random and can be dangerous if you're caught offguard.
- Once the final wave is defeated, Lyranth breaks free, completing the encounter and revealing the reward chest.
Baron Zaudrus
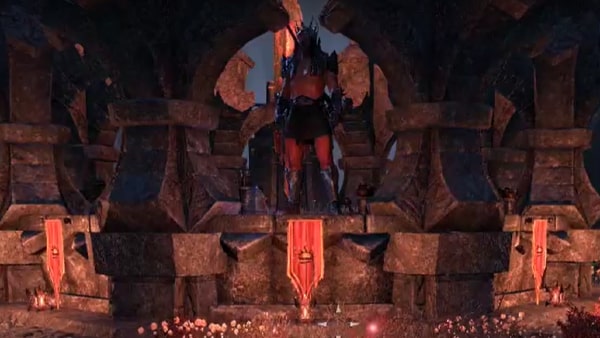
Baron Zaudrus is a Daedric Chieftain and the leader of the Order of the Waking Flame which worships Mehrunes Dagon. He serves as the final boss of the Cauldron.
HP: 5.7 M
Hard Mode HP: 11.4M
Boss Mechanics:
- Light Attack - Standard smash with his hammer.
- Hammer Down (Heavy Attack) - Zaudrus spins around and smashes his hammer on the ground dealing devastating damage and summoning several Molten Pillars around the arena. This attack needs to be blocked to mitigate damage, but it will still summon Molten Pillars regardless.
- Molten Pillars - These are small rock formations summoned by Zaudrus' Hammer Down attack. These hinder player movement and have special interactions with Zaudrus' Ash Vent attack, as well as the Cold-Flame Infusion Synergy given out by Lyranth periodically:
- Ash Vent - If the pillars are touched and destroyed by the beam from the Ash Vent, it will summon a Daedroth to attack players.
- Cold-Flame Infusion - If the pillars are destroyed by a player with the Cold-Flame Infusion, it will summon a Cold-Flame Atronach to aid the group for a limited time.
- Galvanic Blow - A cleave attack that hits in a large cone in front of Zaudrus. Any players hit by this will be charged with a perimeter lightning AoE effect that deals damage to other players in range. If hit, players should spread out to avoid stacking damage.
- Ash Vent - Zaudrus plunges his hammer into the ground whilst summoning bolts of lightning to hit a medium radius area. This attack activates the Ash Vent, which is a beam of flames that goes around the room either in a clockwise or counter-clockwise direction, dealing severe damage to players it touches. The beam can damage Molten Pillars and summon Daedroth Adds if they are destroyed.
- Fiery Geyser - Periodically spawned at random locations throughout the fight. Leaves a flaming geyser in a small radius that persists for a few seconds.
- Stalactite - Falls from the ceiling at random, dealing damage in a small radius.
- Adds - Magma scamps are summoned throughout the fight and Daedroth are created by Molten Pillars being destroyed by the Ash Vent.
Boss Hard Mode Additional Mechanics:
- Hammer Throw - Zaudrus tosses his hammer at a location, causing a magma AoE to spawn in a large radius where it lands. Persists for a while.
- More Adds - Summons Watchlings periodically along with the standard adds.
Strategy:
- Baron Zaudrus is fought in a large circular room with a raised, unreachable platform in the middle where Lyranth will be channeling spells throughout the fight.
- The key to this fight is Lyranth's Cold-Flame Infusion synergy which she will be sending out to aid the group periodically. When Lyranth calls out, damage dealers should seek out her image and activate the infusion which will grant a damage boost. Then, the synergized players should destroy any Molten Pillars in the area to summon Cold-Flame Atronachs which will target Zaudrus and any adds that have spawned. The pillars are easily destroyed by the damage boost from the infusion.
- There will be a lot of movement involved due to the Ash Vent that Zaudrus activates. The boss should be faced away from the party at all times to avoid the cleave from Galvanic Blow.
- When the Ash Vent is active, look out for where the beam is traveling and head in the same direction away from the beam while maintaining the boss' facing and having the party reposition behind him.
- Adds should be cleaved down along with any Molten Pillars or the boss. Be careful not to get overwhelmed by clearing out the pillars.
- The fight plays out fairly similarly in Hard Mode with the addition of Zaudrus' Hammer Throw move and a lot more AoEs to avoid and Adds spawning.
The Cauldron Rewards
- ???
Trivia
- Dungeon Gallery
Information
- Location: Deshaan
- Suggested Level: Max
- Final Boss: Baron Zaudrus
Achievements
- Can't Catch Me!
- Cultist Slayer
- Curtain of Fire
- Daedric Demolitionist
- Flames of Ambition Delver
- Flames of Ambition Explorer
- Flames of Ambition Scout
- Glob Security
- Hold it Together
- Hot-Footed
- Master of Messes
- Relentless Justice
- Schemes Disrupted
- Subterranean Smasher
- The Cauldron Challenger
- The Cauldron Conqueror
- The Cauldron Vanquisher
- Watcher Slayer
Quests
The Cauldron Map
Bosses
Set Drop
NPCs in the area
Enemies
- Armored Daedroth
- Bile Glob
- Clannfear
- Clannfear Matron
- Daedroth
- Dremora Gandrakyn
- Dremora Skullguard
- Dremora Slaver
- Dremora Torturer
- Fetcherfly
- Fetcherfly Hive
- Flame Atronach
- Flame Colossus
- Flame Titan
- Gore Glob
- Kagouti
- Magma Daedroth
- Magma Scamp
- Molten Fiend
- Molten Pillar
- Scamp
- Scorching Ogrim
- Shalk
- Waking Flame Invoker
- Waking Flame Spellsaber
- Waking Flame Torchlord
- Watcher
- Watchling
- Xivilai Ravager
- Xivilai Thresher
- Xivilai Toxicator
 Anonymous

How do I find chockeberry extract ?
0
+10
-1