The Sanctum Ophidia trial is located in High Craglorn added with a Craglorn patch in September 2014. Trials are special PvE group instances in Elder Scrolls Online, which can be identified by the ![]() icon. They have special mechanics and group tactics for 12-player groups to accomplish, and present unique rewards for players
icon. They have special mechanics and group tactics for 12-player groups to accomplish, and present unique rewards for players
Walkthrough & Strategies
 Sanctum Ophidia Trial
The Sanctum Ophidia Trial quest begins when you enter the dungeon. There are 3 bosses the team has to battle during the trial:???
Sanctum Ophidia Recommendations
All Group Members
- CP rank 600+ for Veteran and Hard Mode
- 40k Health
- Appropriate gear for group buffs (Ebon, Worm) and damage buffs (Aether, Alkosh, Twilight, etc.)
- CP 150+ food
- Potions geared to magicka or stamina based character (weapon damage, spell critical, and/or spell power)
- Soul gems
- One group member with Retreating Maneuver skill slotted
Class Ultimates
- Nightblade Ultimates: Veil of Blades, Shooting Star, Fiery Rage (destruction staff)
- Sorcerer Ultimates: Shooting Star, Energy Overload, Suppression Field, Fiery Rage (destruction staff)
- Dragonknight Ultimates:
- Tank: Aggressive Warhorn, Magma Shell, Barrier
- DPS: Shooting Star, Standard, Dawnbreaker, Fiery Rage (destruction staff)
- Templar Ultimates:
- Healer: Aggressive Warhorn, Solar Prison
- DPS: Shooting Star, Solar Prison
Group Composition
-
1 Tank for normal and veteran mode
-
2 Tanks if you are trying veteran Hard-Mode
-
2 Healers is always best as you can provide more group buffs that way
- 10-11 dps: maximum of ? melee
Sanctum Ophidia High Level Walkthrough
Normal mode doesnt have much in the way of mechanics, you can pretty much take any DPS you like.Be sure to stack tightly so your healers can keep you alive through the minimal mechanics.
For vet mode you'll want a maximum of 4 melee to make it 'easier'. This is to ensure that you don't kill each other when bosses Varlariel + The Mage do their damaging attacks.
Boss 1 Possessed Mantikora
- Three red circles (one after another) will be put on random players by Mantikora (He usually shots something and throw his staff before doing this). The circle will stun you shortly and then you will be thrown in the air. You have to dodge roll out of the first circle asap.
- Culminating Slam: Huge AoE damage after the red circle skills. Make sure heals everyone to 100% to stop the bleeding effect.
- Black Holes: The black hole spawns randomly on any player in the group will port you to a side boss. You have 100 seconds to kill this sideboss. Otherwise, Mantikora will be enraged.
- Poison Shard Circles: Mantikora will drop huge red circles with a green shard in it that does huge amount of poison damage. This skill always targets the furthest player from the boss, so dont stick too close together otherwise tanks may not be able to handle this extra damage.
Boss 2 Stonebreaker
- Stomp: From time to time, the Troll will stomp. This deals great damage in a round AoE around him. Avoid standing in it when he is doing his stomp.
- Avalanche: The boss can create an avalanche in three straight lines. This attack can be blocked.
- Stone-Throw: When you see the boss holds up his arms, get ready to dodge/block his stone-throwing attack.
Boss 3 Ozara
- During this boss fight, a Troll, an Overcharger, a War Priest, an Archer, and two Skirmishers will spawn regularly.
- Pin Bolts: As soon as the fight starts, after 5 to 10 seconds, Ozara will start to pin two random players around her with a lightning AoE.
Boss 4 The Serpent
- Poison Phase: When the boss goes down under the ground and appears in the middle of the platform center, poison phase is incoming. He will deal very high damage with his poison, that is spread out to the whole room. And when this phase is over, the Serpent will do a frontal cleave attack, so stay away and wait until the Main Tank has taunted him and faces him away from the group.
- Totems and Lamias: After first poison phase, the first Lamia will spawn at the left side of the room. Also two Totems, a green and a blue one, will spawn.
Information
- Location: Craglorn
Achievements
- Sanctum Ophidia Complete
- Sanctum Ophidia Conquerer
- Time Trial: Sanctum Ophidia
- Sanctum Ophidia Difficult Mode
Bosses
Quests
Set Drops (SO only)
Set Drops (All Craglorn Trials)
Crafting Motifs
- Celestial Style
- Chapters are possible rewards for completing the weekly quest The Oldest Ghost
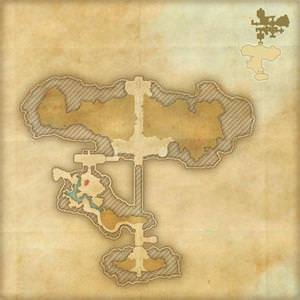
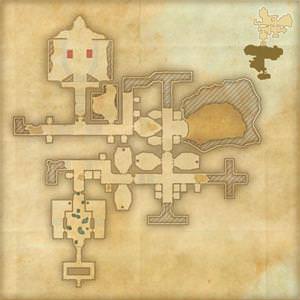
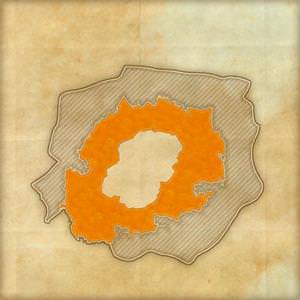
Sanctum Ophidia Maps
Sanctum Ophidia
First Area

Sanctum Ophidia
Second Area

Sanctum Ophidia
Final Area

 Anonymous
You need 1 Tank for normal and veteran mode
You need 2 Tanks if you are trying veteran Hard-Mode
2 Healers is always best as you can provide more group buffs that way.
Normal mode doesnt have much in the way of mechanics, you can pretty much take any DPS you like.
Be sure to stack tightly so your healers can keep you alive through the minimal mechanics.
For vet mode you'll want a maximum of 4 melee to make it 'easier'.
This is to ensure that you don't kill each other when bosses Varlariel + The Mage do their damaging attacks.
For the final boss you can reduce the high damage from chain-lightening by having your melee DPS stack 2 + 2.
Your ranged DPS stand on the outer ring as much as they can.
For vet mode, its best to unsummon any Sorcerer Imp pets as they are also affected by chain lightening.
If you run a pet sorc build you can instead use the twilight at she isnt affected by chain-lightening as she is off the ground.
The tank should focus only the flying axes, and pull them to one side of the room.
Melee DPS should focus only the Main Boss.
Ranged DPS should focus the 'mini mage' as soon as it arrives, then get back to DDing the main boss.
Magika DDs can use light armour shield to walk into the explosive mines to 'pop' them.
At around 17% the mage will know everyone down 3 times.
At this point you ALL run to the mage, stand in melee and burn down her last few %.
At this stage she will do huge ongoing raid-wide AOE damage, that needs to be healed through with healing springs.
Keep Warhorn up throughout for the extra HP.
Nova helps reduce the damage here, staggering 2 Novas over that last phase gives you almost 20 seconds of reduced damage.
 Anonymous
I'm so glad that it doesn't have enemies, strategies, sets, or basically anything listed! Soooo useful!

 Anonymous
 Anonymous

A serious case of copy and paste from somewhere else issue here!
0
+11
-1