The Halls of Fabrication trial is located in Vvardenfell within Morrowind.
DISCOVER THE CLOCKWORK CITY
Within the tower, a group of twelve battle through a series of challenges. Ancient and deadly clockwork automata are spilling forth from a mysterious magicka conduit, and you and your companions must enter the rift, discover the Clockwork City's Halls of Fabrication, and shut down the Assembly General. In the Halls of Fabrication, you and your team will uncover the secrets of Sotha Sil's experiments and put an end to the Fabricant threat. You will not be alone, however, as you will be assisted by the mysterious and powerful Dunmer sorcerer Divayth Fyr himself!
If you played through The Elder Scrolls III: Morrowind, you'll recognize the classic Elder Scrolls character. As Divayth guides you throughout the halls of Sotha Sil's complex, he will offer (mostly) helpful advice for dealing with the Fabricant threat. Pay close attention to the Telvanni sorcerer, as he could provide clues regarding some of the Trial's more challenging mechanics!
Walkthrough & Strategies
 Halls of Fabrication Trial
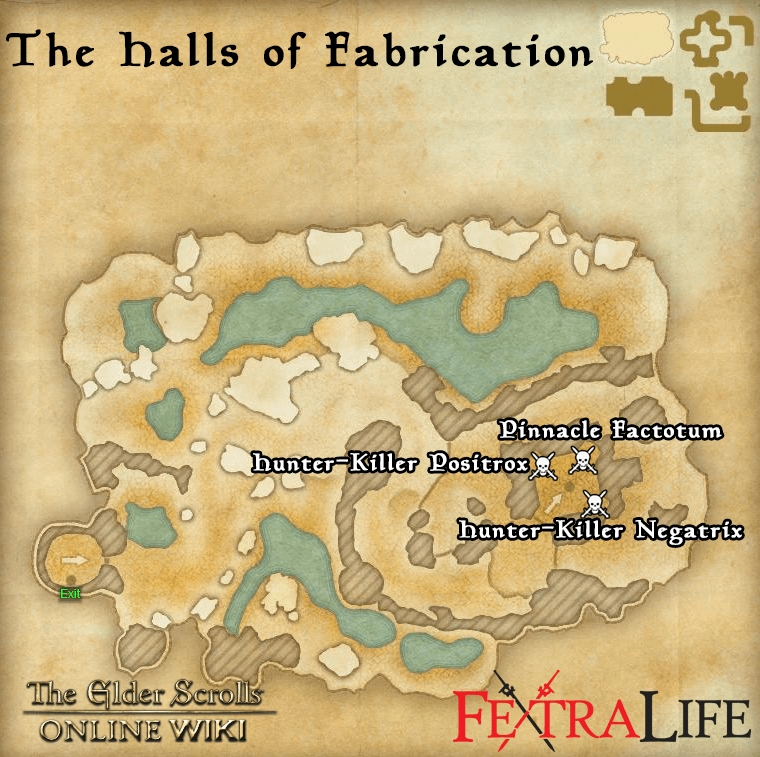
The Halls of Fabrication Trial quest begins when you enter the dungeon. There are 5 (technically 8) bosses the team has to battle during the trial:
- Hunter-Killer Fabricants (Hunter-Killer Positrox and Hunter-Killer Negatrix)
- The Pinnacle Factotum
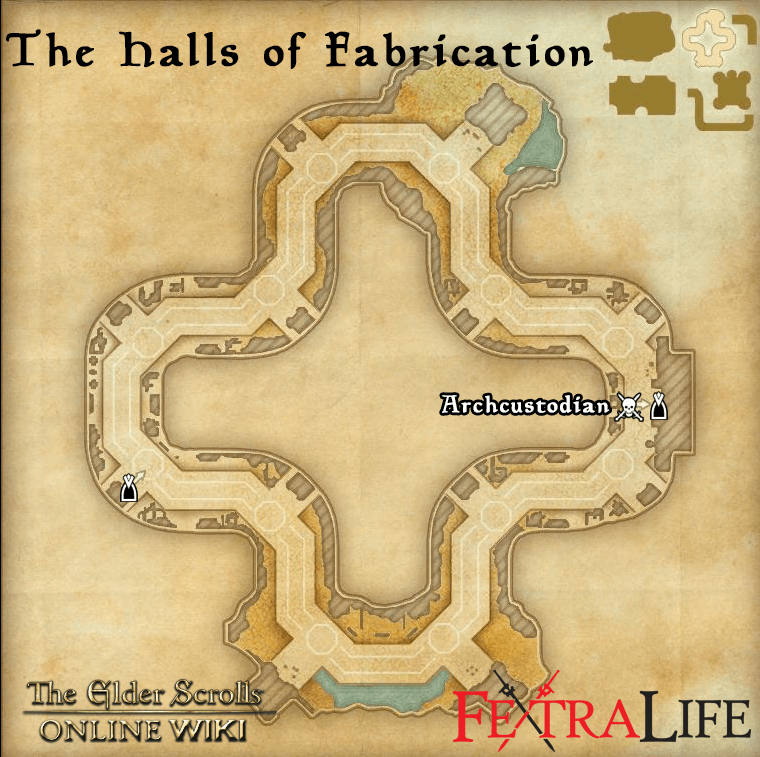
- The Archcustodian
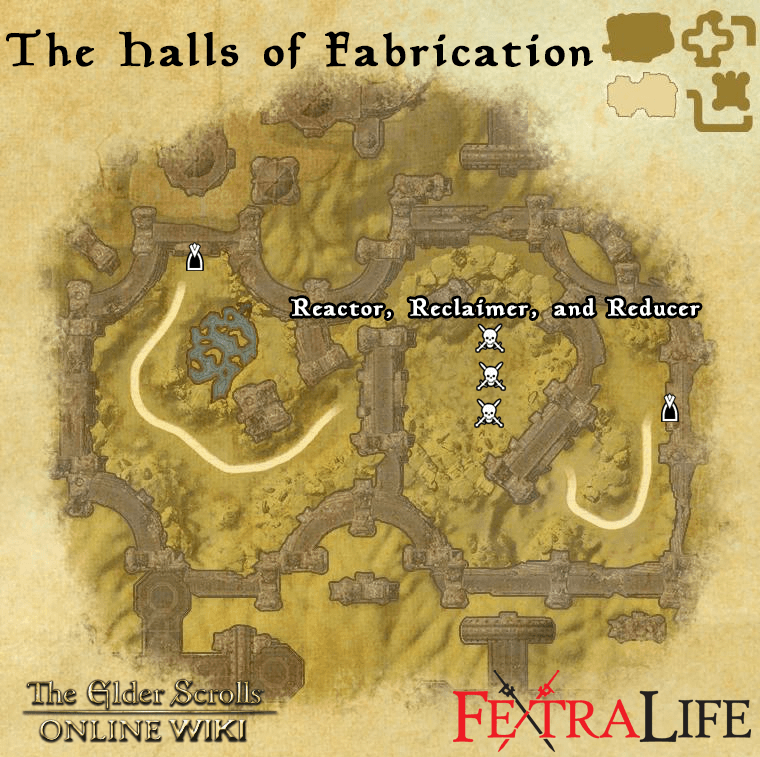
- The Refabrication Committee (Reclaimer, Reactor, and Reducer)
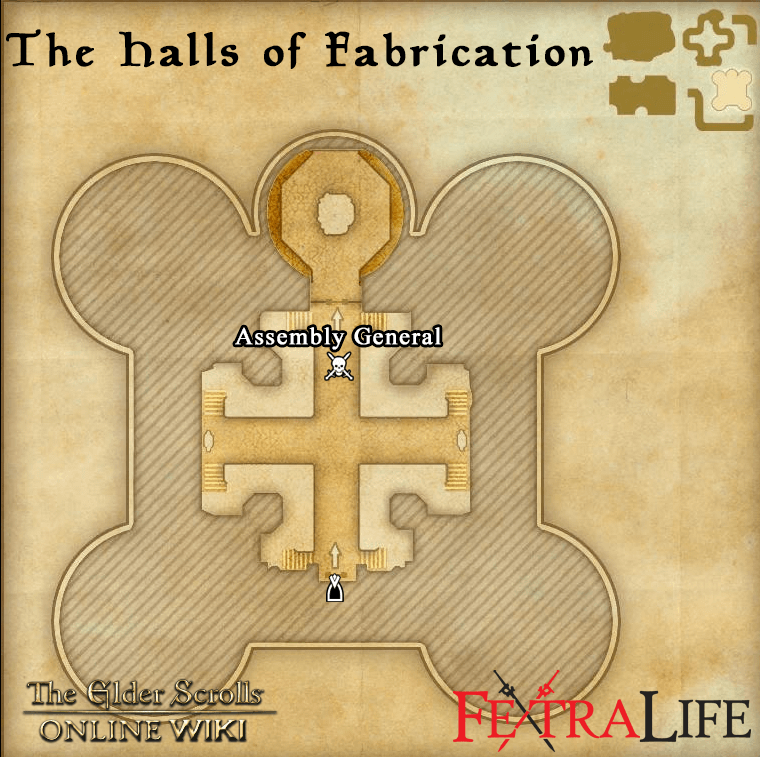
- The Assembly General
Halls of Fabrication Recommendations
All Group Members
- CP rank 660 for Veteran and Hard Mode
- 40-45k+ Health for tanks, 16+k for DPS and healers, with appropriate shielding
- Appropriate gear for group buffs (Ebon, Worm) and damage buffs (Aether, Alkosh, Twilight, etc.)
- CP 150+ food
- Potions geared to magicka or stamina based character (weapon damage, spell critical, and/or spell power)
- Soul gems
- One group member with Retreating Maneuver skill slotted
- The Purge skill from Alliance War skill line
Class Ultimates
- Nightblade Ultimates: Veil of Blades, Shooting Star, Fiery Rage (destruction staff)
- Sorcerer Ultimates: Shooting Star, Energy Overload, Suppression Field, Fiery Rage (destruction staff)
- Dragonknight Ultimates:
- Tank: Aggressive Warhorn, Magma Shell, Barrier
- DPS: Shooting Star, Standard, Dawnbreaker, Fiery Rage (destruction staff)
- Templar Ultimates:
- Healer: Aggressive Warhorn, Solar Prison
- DPS: Shooting Star, Solar Prison
Group Composition
- 1-2 tanks on normal mode
- 2 tanks on vet and hard mode
- 2 healers
- 8 dps: maximum of 2-3 melee
Halls of Fabrication High Level Walkthrough
The trial is not a DPS check until execute phase on the Assembly General. It is highly recommended to shield continuously to prevent strain on the healers. This is why it is recommended that magicka DPS permanently slot Harness Magicka. The entire trial is a test of your tanks.
Boss 1- Hunter-Killer Fabricants
One of the easiest bosses in the trial. Each tank takes one of the Fabricants. Mechanics to be aware of:
- Bosses will spawn small areas of lightning. Tanks have to step out of those or risk dying.
- Bosses will periodically spawn waves of lightning. If it hits, it will stun you; break free.
- Periodically, you will have Dwarven Spheres spawn with massive shields. Tanks have to bring the bosses relatively close together to spawn a beam between them. As long as the beam exists, both bosses will be empowered and their lightning waves will kill DPS. However, the beam breaks the shields on the spheres, so it is very important to break the shields, and then break the beam ASAP. DPS should focus down spheres. The Purge spell here is used for the spheres as they shoot Poison Injections doing a massive DOT on whoever gets hit, so Healers should be slotting Purge as well as the tanks. The Spheres also periodically perform a Taking Aim shot which needs to be interrupted by either tanks or healers.
- Shalks will periodically spawn. Kill shalks.
Generally, kill Positrox until around 20% HP, then switch focus to Negatrix. If one boss dies before the others, empowered Dwarven Spheres spawn which spell certain death for most of the group if the bosses are not killed close enough together.
Boss 2-The Pinnacle Factotum
This is the roadblock many groups face in the trial. The boss' HP is just over 59 million, and it is important that everyone is aware of the mechanics for this fight or it can result in a group wipe very easily.
Mechanics to be aware of:
- Top Group:
- Four DPS have to periodically head to the upper floor when Divayth Fyr calls for you to come up there. Once there, the group will have to kill four similarly shielded spheres to the first boss. However, the beam will come from the middle generator onto a random person, and will periodically shift to other people. Lightning like the Molag Kena fight in White-Gold Tower lies between the spheres.
- The person with the lightning beam on them has to shield and line themselves up with the sphere so that the shield is broken, then the sphere has to be DPS'd down. There is very little time to be lost on this phase. The beam is also a damage amplification so even if the shield is broken it is best to keep lining up.
- Once this is done for all 4 Spheres, each person goes to a switch located where a sphere was (set this up in advance) and hits it at the same time. Once done, jump down the hole and rejoin the main fight. This will be done a number of times.
- While the top group is doing their thing, there will be meteors that spawn on bottom. They do Oblivion damage, and three of them will kill you. It is very important to shield and avoid them.
- Centurions will periodically spawn. Once they're near a group of people, they will launch a Steam attack which does a lot of damage and applies the Scalding debuff, which stacks up to 100 and reduces healing received % wise per stack up to 100 stacks, which negates all healing received. Step out and avoid the shots, and burn the centurion.
- The Factotum will periodically disappear and spawn as 4 shades, usually on the tank. These shades will shoot waves in the direction they face so it is important that no one gets caught near the tank when this happens.
- Once the Factotum is damaged down to 70%, there will be Sharpened Conduits that spawn periodically for the rest of the fight. The shots from these conduits drain resources and do a lot of damage, and it is the most damaging mechanic on this boss.
- Once the Factotum is damaged down to 40%, a second Centurion will periodically spawn in addition to the main one. This one will continuously spin, doing damage and oneshotting any non-Tanks, so it is important to avoid and focus down the centurion.
Boss 3 - Archcustodian
The Archcustodian is a large Dwarven Spider found at the Halls of Fabrication. It is surrounded by a damage shield, and therefore invulnerable. To dispel the shield, lure it further down the hallway, and activate the Shock Pylons.
The boss will be stunned for approximately 15 seconds, after that it will spawn two adds. You need to kill these adds before you can stun the boss next time
Boss Mechanics:
- Shield
As long as the shields up, you can not damage him.
The shield kills you if you walk into it.
If adds get too close to the boss's shield, they will get a shield on themselves and will be harder to kill. - Stunphases
Every time you activate the Shock Pylons, the boss will move faster to the next platform.
Place all your DoTs and ground-based DoTs on the boss already, so you can go full out on damage when the boss gets stunned. - Adds -Every time after the boss recovered from the stun, two adds will spawn. Its either a Two hander or a Dualwield add. Make sure not to get damaged by the adds, avoid unnecessary damage.
- The blades deal lots of damage causes bleed. Also, if you try to run away from boss, it will shoot shock darts at you.
Boss 4 - Reactor, Reclaimer, and Reducer
The three Factotum can form a link that strengthens all of them if they stay close enough. Therefore, they should be kept separate. At certain health thresholds (70%, 40%, and 20%), each of them will overcharge and be immune to all damage. Once all three enemies are overcharged, bringing them together will reverse that, allowing them to be damaged again.
Boss Mechanics:
- The Reactor periodically sends out rolling bits of electricity. Where they hit, reanimated construct limbs will appear, damaging and stunning players.
- The Reclaimer does not move during the fight, but stays at the center of the arena. During the fight, additional Ruined Factotums will spawn, and walk slowly to the Reclaimer. If they reach them, they will then run towards a player, where they will explode. It is therefore advised to kill the adds before they reach the Reclaimer. If the Reclaimer has been slain, the adds will explode immedeately after spawning.
- The Reducer also sends out bursts of flame that apply a debuff to all players hit. The debuff drains the victim's health, and should be dispelled as quickly as possible.
Final Boss - Assembly General
The Assembly General is a Dwarven Colossus found at the end of the Halls of Fabrication. Though technically an artificial intelligence in charge of reassembly, it will control a physical body during the fight, and must be dealt with while Divayth Fyr attempts to hack its main console.
Boss Mechanics:
- Stomp - This boss can raise his left foot and stomps it on the ground, everyone in melee range has to block, otherwise you will get knocked back.
- Two arms - The arms of boss operate independently of its main body (The Truncating Arm and the Enkindling Arm), and deal damage to players on the top platforms. When enough damage is done, each arm will fall off, and the severed stump will begin shooting out highly damaging sparks. Two Factorum will spawn at this time, and will persist until killed.
- Fingers - This boss can spawn fingers using his right foot, so make sure not to get stuck in them.
- Meteors - boss summons meteors on players that deal tons of damage, that is why it is important not to overlap too much.
- Periodically, the Assembly General's head will glow and he will announce that he is scanning a player. A Tactical Facsimile will be created at the scanned player's location.
- Two Handers & Megamans - At 90% & 87% / 70% & 67% / 50% & 47% adds will spawn.
- Second phase - At 85%, 65%, and 45%, the Assembly General will enter his second phase. During this phase, the Assembly General will move to the center of the arena, and begin launching rockets out of its Enkindling Arm. Four terminals will spawn at each end of the arena, and traps including toxic coolant, spinning blades, and shock fields, will fill the arena. Players must kill the four terminals within a certain time frame or they will suffer a large amount of shock damage. Standing on the top platforms will cause the players to take shock damage, while standing on anything except the track of the spinning blade will cause the player to take damage from the Toxic Coolant.
- Execute Phase at 25% - at 30% and 27% you will again get the addspawns. The boss will move to the center and begin firing out guided rockets, which increase in frequency as time progresses.
Information
- Location: Vvardenfell
Achievements
- Halls of Fabrication Complete
- Halls of Fabrication Conquerer
- Time Trial: Halls of Fabrication
- Halls of Fabrication Difficult Mode
- And more achievements here
Bosses
- Hunter-Killer Fabricants (Hunter-Killer Positrox and Hunter-Killer Negatrix)
- The Pinnacle Factotum
- The Archcustodian
- The Refabrication Committee (Reclaimer, Reactor, and Reducer)
- The Assembly General
Quests
Set Drops
Crafting Motifs
- Buoyant Armiger Style
- Chapters can be found in chests within the Halls of Fabrication
- Refabricated Style
- Chapters/Book dropped by Assembly General
- Guaranteed Chapter Drop on Hard Mode
Halls of Fabrication Maps
Abanabi Cave
Rift
Reprocessing Yard
Core Assembly
 Anonymous


Guess the editor never got past the 2nd boss.
2
+10
-1