There are multiple versions of this dungeon, please click tabs to see their information, or go to their individual pages.
City of Ash is another 4-man dungeon in Elder Scrolls Online. It is found in Greenshade. Players can use the Group & Activity Finder tool to easily find groups to tackle this dungeon with.
Veteran Walkthrough & Strategies
Infernal Guardian
Level:
HP:
The battle against the Infernal Guardian requires your party to pay attention, and have a solid healer. As long as you have those two things going for you, this battle isn't overly difficult. At multiple points throughout the battle, the Guardian unleashes a batch of AoE fire attacks. While these attacks are not difficult to evade, there are a lot of them. If you're not paying attention during the attack, you will almost certainly take damage.
Other than the AoE fire spells, there isn't much to worry about when it comes to the Infernal Guardian. The healer will have his or her hands full because the Guardian attacks random party members no matter how skilled the tank may be. As long as the healer keeps the party near full health and the tank blocks the Guardian's Power Attacks, this fight should go smoothly.
Warden of the Shrine
Level:
HP:
The healers and tank are extremely important during the battle against the Warden. Your tank will take significant damage from many of the Warden's attacks, so healers need to keep a close eye on the tank's health at all times. It's also very important that the tank blocks all of the Warden's Power Attacks. If even one of the Power Attacks is not properly defended against, it could make the fight extremely difficult. Even with the best healers, it's hard to recover from getting hit by one of the Warden's Power Attacks.
In addition, the Warden creates large areas of fire throughout the fight. If you have melee damage dealers (DPS), it's important that the tank moves the Warden out of the fire so the melee DPS can avoid taking damage. If you have a party with ranged DPS, this isn't as important, but should still be done to ensure the tank isn't taking extra damage. Beyond this, the Warden will randomly attack party members and use some easily avoidable AoE attacks. With a solid healer, these attacks should not be an issue.
Razor Master Erthas
Level:
HP:
Like every boss in the City of Ash dungeon, Erthas uses AoE fire attacks. Most of them are fairly easy to avoid as long as your party pays attention. However, when Erthas uses a cross-shaped AoE fire attack, it can be much harder to avoid. Save a bit of stamina and roll to avoid this attack if need be.
Ranged DPS have it a little bit easier during this fight because Erthas frequently teleports around the area. It can be frustrating for melee DPS to deal with, but keep an eye on Erthas and follow the boss as he teleports. He will summon a Flame Atronach to help him in battle. When this happens, the DPS should burn it down quickly to avoid any headaches from having to deal with the add and the boss at the same time.
Trivia
- ??
City of Ash Information
- Location: Greenshade
- Suggested Level:
- Final Boss: Razor Master Erthas
- Achievements:
Achievements
- ??
Quests
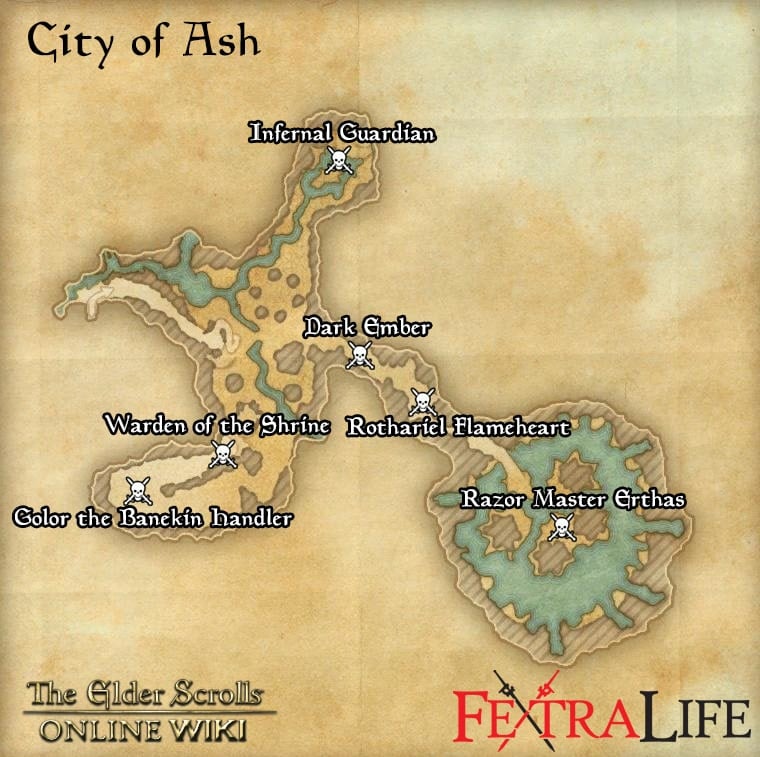
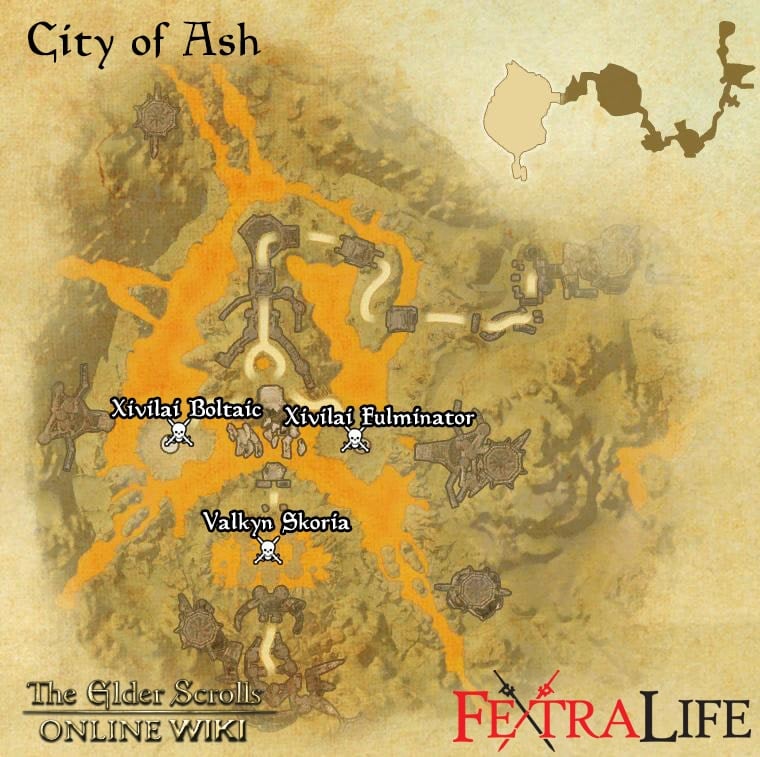
City of Ash Map
Bosses
Set Drop
NPCs in the area
- ??
Notable Items
- ??
Enemies
- ??
City of Ash is another 4-man dungeon in Elder Scrolls Online.It is found in Greenshade. The suggested level for this dungeon is between 28-31. There are 3 mini bosses and 3 bosses located inside, all of which can drop loot. The loot in this dungeon scales to your level. The dungeon has 3 quests to offer - Razor's Edge, Return to Ash and City of Ash Pledge - all of which grant you some loot or skill points for completing. Players can use the Group & Activity Finder tool to easily find groups to tackle this dungeon with.
Veteran Walkthrough & Strategies
Veteran City of Ash presents some very challenging but fun boss fights for Veterans. The City of Ash is engulfed in flames (loads of them!) so bringing along some fire resistance jewelry might not be a bad idea.
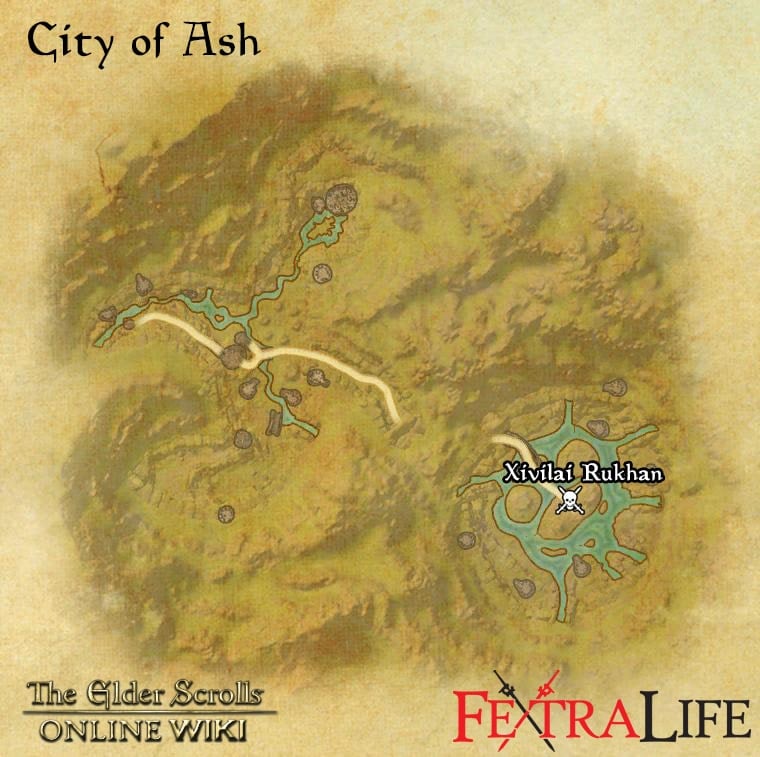
Xivilai Rukhan
Boss Mechanics: This boss is assisted by two ranged Dremora friends, a Mage and an Archer. The boss typically deals a heavy attack which can be blocked. Upon the death of his companions, the boss will spawn series of Flame Atronachs who typically can be ignored.
Strategy: Deal with the two ranged assistants first as quickly as possible because the Mage and the Archer can randomly teleport in front of or behind you. The tank should keep the boss facing away from the rest of the group, and deal some AOE when possible. The healer should position himself between the tank and DPS to provide constant healing to low healthed allies or employ "healing over time" effects at the earliest instance possible. The DPS should kill the Mage quickly with ultimates and potions and repeat the same for the Archer. Once done, fight the boss from atleast an 8 meter range if possible to avoid the damaging read circles. If the tank loses aggro, block Rukhan's attacks till the tank has the boss aggro'd again.
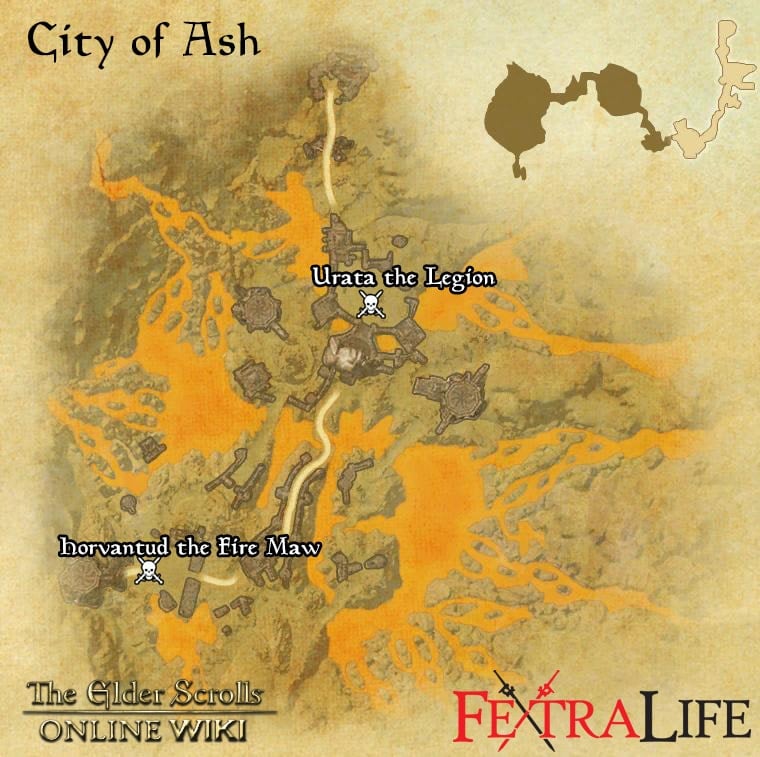
Urata the Legion
Boss Mechanics: Urata spawns 20 additional mobs which have to be cleared in order to fight him. She constantly spawns red circles on players to penalize those who stay still too long.
Strategy: Attack the ads first and use them to attain ultimates faster. Avoid the red circles and continually attack at the same time. The tank should use taunts from range and stun the ads as much as possible. The healer should have an easier job of just keeping an eye on players getting damaged from the red circles. Use a combination of Combat Pray, Healing Ward and Barriers to delay death and buy time to use Health Springs. You should attack the boss as much as possibe and just avoid the red circles.
Xivilai Boltaic & Xivilai Fulminator
Boss Mechanics: These two bosses are very alike and simple to strike down.
Strategy: Just nuke the two of them and move on.
Horvantud the Fire Maw
Boss Mechanics: This boss will truly challenge your skills. He often spews hot lava that shall vaporize players if not agro'd away from the team. This boss also starts with earthquakes that cause rocks to spring out of the floor, which if not blocked can deal a lot of damage. He also stomps to cause red circles which are best avoided by spreading out.
Strategy: Face the boss away from the group and roll out of the cleave attacks. Stay spread out from each other during the stomping and watch the ground for the red circles. Step out of them but stay near, as you will immediately have to go back to them to protect yourself from the damage. Use ultimates when possible to deal as much damage to ads and the boss.
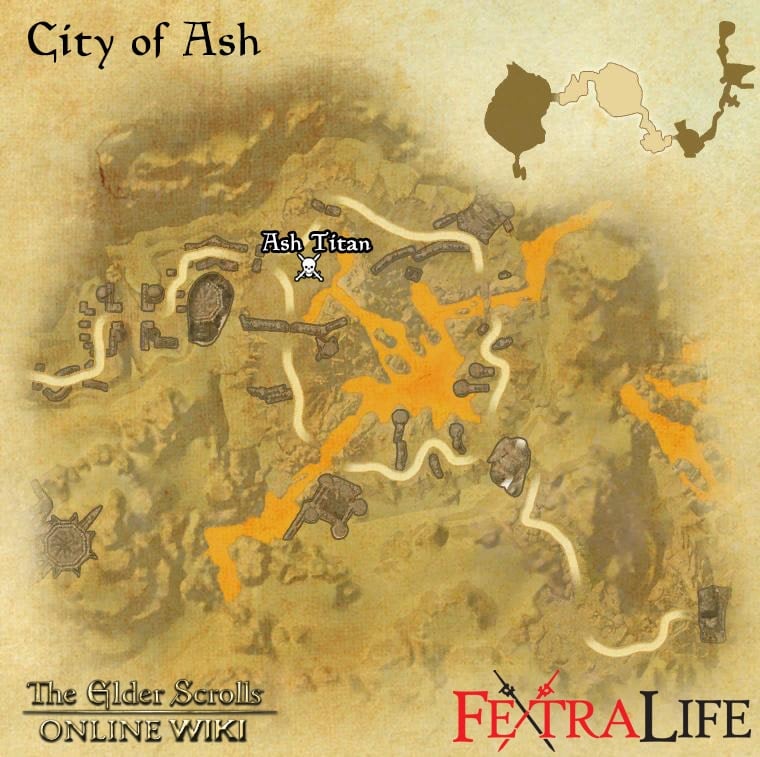
Ash Titan
Boss Mechanics: This boss is very similar to the Titan in Elden Hollow. The aggro will cause the boss to throw fire circles at your feet. The boss will also occasionally jump to cause waves of fire to push you back. There will also be ads but they deal very little damage.
Strategy: The tank's aggro is very important this round. Taunt the ads but keep the boss agro'd as much as possible. Avoid the big red circles and heal through smaller ones. Always be ready to roll to avoid double red circles spawning at your feet. The healer must keep the tank alive to avoid losing to the boss. Rest of you should just charge in and attack as much as possible while avoiding the waves and big red circles.
Valkyn Skoria
Boss Mechanics:
Recommended Group: 1 tank, 1 healer with some dps, 2 dps. If you want to do the challenge at higher VR levels, you can have 1 tank/healer and 3 DPS and burn through the heals the boss gets.
Strategy:
Trivia
- ??
City of Ash Information
- Location: Greenshade
- Suggested Level: 28-31
- Final Boss: Razor Master Erthas
- Achievements: 1
Achievements
- City of Ash Vanquisher: Defeat Infernal Guardian, Razor Master Erthas and the Warden of Shrine in the City of Ash.
Quests
City of Ash Map
Bosses
Set Drop
NPCs in the area
Notable Items
Enemies
 Anonymous
Well this strategy guide is***** and lists maybe half the mechanics in this dungeon... For example, Urata the Legion will, throughout the fight, summon adds that are copies of herself with less stats and after a while, if not killed, will absorb them and heal all their current health, making this fight much harder than what the guide suggests as you'll need to burn them ASAP...

 Anonymous
 Anonymous

THANK YOU
0
+10
-1