Hel Ra Citadel trial is located in West Craglorn in Elder Scrolls Online. Trials are special PvE group instances in Elder Scrolls Online, which can be identified by the ![]() icon. They have special mechanics and group tactics for 12-player groups to accomplish, and present unique rewards for players. There is no lockout for trials but you only get 36 rezzes for your entire trial death. Each death will add additional minutes to your trial timer. Once you run out of 36 rezzes, you have to zone out, disband your group, reform and retry all the way from the beginning..
icon. They have special mechanics and group tactics for 12-player groups to accomplish, and present unique rewards for players. There is no lockout for trials but you only get 36 rezzes for your entire trial death. Each death will add additional minutes to your trial timer. Once you run out of 36 rezzes, you have to zone out, disband your group, reform and retry all the way from the beginning..
Walkthrough & Strategies
 Hel Ra Citadel Trial
The Hel Ra Citadel Trial quest begins when you enter the dungeon. There are 4 bosses the team has to battle during the trial:
- Ra Kotu
- Yokeda Kai
- Yokeda Rok'dun
- The Warrior
Hel Ra Citadel Recommendations
All Group Members
- CP rank 600+ for Veteran and Hard Mode
- 40k Health
- Appropriate gear for group buffs (Ebon, Worm) and damage buffs (Aether, Alkosh, Twilight, etc.)
- CP 150+ food
- Potions geared to magicka or stamina based character (weapon damage, spell critical, and/or spell power)
- Soul gems
- One group member with Retreating Maneuver skill slotted
Class Ultimates
- Nightblade Ultimates: Veil of Blades, Shooting Star, Fiery Rage (destruction staff)
- Sorcerer Ultimates: Shooting Star, Energy Overload, Suppression Field, Fiery Rage (destruction staff)
- Dragonknight Ultimates:
- Tank: Aggressive Warhorn, Magma Shell, Barrier
- DPS: Shooting Star, Standard, Dawnbreaker, Fiery Rage (destruction staff)
- Templar Ultimates:
- Healer: Aggressive Warhorn, Solar Prison
- DPS: Shooting Star, Solar Prison
Group Composition
-
1 Tank for normal and veteran mode
-
2 Tanks if you are trying veteran Hard-Mode
-
2 Healers is always best as you can provide more group buffs that way
- 10-11 dps: maximum of ? melee
Hel Ra Citadel High Level Walkthrough
Before beginning the trial, the group should split into two. One group with the Main Tank, 4 damage dealers and a healer, and one group with an Off Tank, 4 damage dealers and a healer. This is for a mechanic presented after defeating the first boss. The group with the Main Tank should be designated the Left Group and should include damage dealers with heavy AoE capabilities while the group with the Off Tank should be designated the Right Group and it is important that this group includes players with Interrupt abilities slotted in.
Boss 1 Ra Kotu
The boss will use the following notable abilities:
- Gusts - Summons gusts on the ground that will target players randomly. These should be avoided or healed through by the healers.
- Six Sword Assault - Throws 4 swords diagonally from the boss which travel outwards and then return to the boss. Hits twice on the way out and back. This can be avoided completely by standing directly behind the boss.
- Spinning Attack - Used periodically from 35% health and below. Ra Kotu spins and slashes around him repeatedly dealing massive amounts of damage.
The boss will spawn with two War-Priests and a Destroyer which can either be stacked on the boss or tanked to the side nearby by the Off Tank. With either option, they need to be taken out immediately before focusing on the boss. Ra Kotu should be faced away from the group to prevent cleave damage while leaving enough room for the tank to move during the boss' spinning attack. The Gusts he summons will target a player at random and the targeted player can kite these away from the group. However, they do track for a little while so it may be better to heal through the damage if your healer is geared well enough. Players should avoid standing at the boss' diagonals to prevent getting swiped by Six Sword Assault. If caught unaware, the affected player should block immediately to prevent getting killed by the sword on its way back to the boss. Once the boss begins using his Spinning Attack at 35% health, melee damage dealers should switch to ranged and stay far away from the boss while switching back during breaks between his spins.
Boss 2 Yokeda Kai & Yokeda Rok'dun
The next section of the Trial will have the group face two bosses simultaneously on different sides of the map and this is where the groups should split up and enter one of two gates that have opened up. The Left Group should head for the left gate which leads to Yokeda Rokdun and the Right Group should head for the right gate which leads to Yokeda Kai.
Yokeda Rokdun (Left Group)
- The Left Group will have to go through three areas separated by gates which the Right Group will need to open for them. In the first area, the group will be attacked by small groups of adds which will keep spawning until the gate is opened. There will also AoE damage from the oils dropping from above which should be avoided.
- Once the first gate opens, the group should head into the next area where they will encounter two Gargoyles. These enemies can petrify players with their cone attack which can be broken out of easily. Players should avoid the red AoE from the Gargoyles' ground pound move, which does increasingly more damage and is fatal if you are caught in it.
- The final area will have the group faced with waves of mobs. The first wave consists of War-Priests, Warriors and Welwa. The second wave consists of Destroyers with Armored Welwa. The Destroyers should be pulled by the tank immediately as they can deal massive damage to other players. Watch out for their red AoE circle that they place on random party members. These members should move away from the group and block, otherwise the group can take massive amounts of damage. The third and final wave will consist of a lot of Welwa, Archers and Flame-Shapers. Be sure to interrupt the Flame-Shapers when they raise their arms.
- Once the waves are down, Yokeda Rok'dun will emerge. This boss does not need to be tanked and has few notable mechanics. He will periodically spawn flaming circles on the ground which will spit out fire in several directions and should be avoided. The tank should instead pull the Welwa away from the group until they become larger, at which point the Tank should stack them on the boss for the damage dealers to focus on or AoE down. The boss will revive them as soon as they die and the tank should once again pull them away from the boss. This is done to prevent overwhelming the tank as there will be more and more Welwa the longer the fight goes on and once they enlarge, they can do massive amounts of damage. Melee players should be careful not to stand behind the Welwa as they use a cone-shaped attack that hits behind them.
Yokeda Kai (Right Group)
- The Right Group should wait until the Left Group has entered their gate. Once they do, a group of mobs will spawn by the Right Gate which need to be killed immediately. Past the gate, the group should hurry up the battlements, clearing mobs along the way. Be on the lookout for two levers which the group needs to pull in order to open the gates for the Left Group. After pulling the second lever, the group will come across some Ballistae and Catapults along with some mobs and Gargoyles. Defeat these mobs and watch out for the Gargoyles' ground pound move. Destroy the siege weapons to prevent them from firing on the Left Group.
- Once the mobs are taken care of, Yokeda Kai will emerge from the gate. The boss will periodically split into 4 copies of himself which will emerge from the corners of the room. Look for the flame patches as the clones will spawn from these places each time. It is recommended that Yokeda Kai is tanked away from the center of the room so that he will run to it when he performs the split. This is done to more easily predict when the split will happen. It is also recommended that one Damage Dealer is assigned per spot. Kai and the clones will use a channeled Fire Attack similar to the Flame-Shaper mobs, which needs to be interrupted. A meteor may periodically target a random party member as well and this deals massive amounts of damage and is likely to one-shot. Players should be ready to block at all times or dodge if they can.
After both bosses are defeated, the groups will reunite in the next room. There is a large army waiting right by the stairs to the final boss, consisting of several War-Priests, Flame-Shapers, Gargoyles and Destroyers. You can take these mobs carefully in waves, or go all in. The important mobs to pay attention to are the Gargoyles and the Destroyers. It's best if the tank(s) separate the Gargoyles away from the main group to avoid the ground pounds while the rest of the group work on the other mobs. Damage Dealers should take care of interrupts for the Flame-Shapers.
There is a War Horn opposite the staircase which can be blown prior to engaging the enemies for an Achievement if playing on Veteran mode. Although doing so will cause the entire horde of enemies at the stairs to engage you which can overwhelm an unprepared group.
Boss 3 The Warrior
The Warrior serves as the final boss of Hel Ra Citadel and has many mechanics to take note of. At the start of the fight, there will be two large AoE circles to the left (Yellow) and to the right(Blue). The yellow light will provide a health and healing boost while the blue light will provide a damage buff. The boss should be tanked in the center pedestal, just next to the blue AoE, in order for damage dealers to take advantage of the buff. The boss will remove the buff circle from the yellow light at 85% HP and the blue light at 70% HP. The fight is pretty standard until he reaches 35% HP. Avoid AoEs and time your blocks for his devastating moves and take care of the adds whenever they spawn as taking too long killing adds will cause more and more to spawn. At 35% HP, the boss gains a devastating frontal cleave attack that must be avoided by all players and blocked by the tank. Aside from that, he will periodically raise his sword and shine a bright light signaling his Star Fall move which bombards the room with magic missiles for several seconds.
- Shield Toss - The Warrior targets a random player and tosses his shield at them. This is telegraphed by a narrow strip AoE aimed at the player. All players need to dodge out of the way of this or block as it is likely to one-hit.
- Leaping Attack - The boss will target the player furthest from him and jump on them. This attack is fatal if not avoided. However, this attack can be prevented altogether if no player stands too far away from the boss.
- Heavy Combo - The boss will perform four strikes in succession on the tank. These attacks need to be blocked or they can prove fatal.
- Adds - The boss will periodically summon several Flame-Shapers and Destroyers. Simply use the same tactics as before. Interrupt the Flame-Shapers and move away from the group and block if the Destroyer places the red circle on you.
- Shehai - At around 35% health, the boss will explode, killing all adds and dropping his mace and shield. Players should spread out and block. He then brandishes a sword of light and will start dealing more damage and increasing the frequency of his attacks.
- Star Fall - The boss raises his sword and summons several magic missiles to bombard the party. Everyone should spread out to avoid stacking damage and the healers should use their most powerful heals during this phase.
Information
- Location: Craglorn
Achievements
- Hel Ra Citadel Complete
- Hel Ra Citadel Conquerer
- Time Trial: Hel Ra Citadel
- Hel Ra Citadel Difficult Mode
Bosses
- Ra Kotu
- Yokeda Kai
- Yokeda Rok'dun
- The Warrior
Quests
Set Drops (Hel Ra only)
Set Drops (All Craglorn Trials)
Crafting Motifs
- Celestial Style
- Chapters are possible reward for completing the weekly quest Assaulting the Citadel
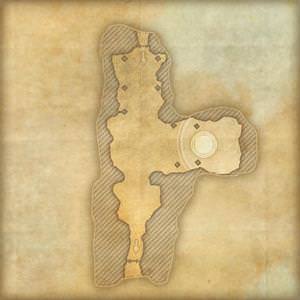
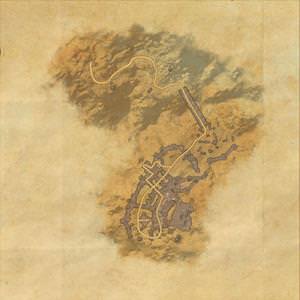
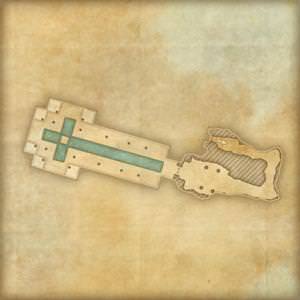
Hel Ra Citadel Maps
Hel Ra Citadel
First Area

Hel Ra Citadel
Second Area

Hel Ra Citadel
Final Area

 Anonymous
 Anonymous
You can do nHRC with just 1 Tank & 1 Healer as long as people are somewhat competent. The Healer just needs to go to the right (top side) at the split.

 Anonymous

lol
0
+10
-1