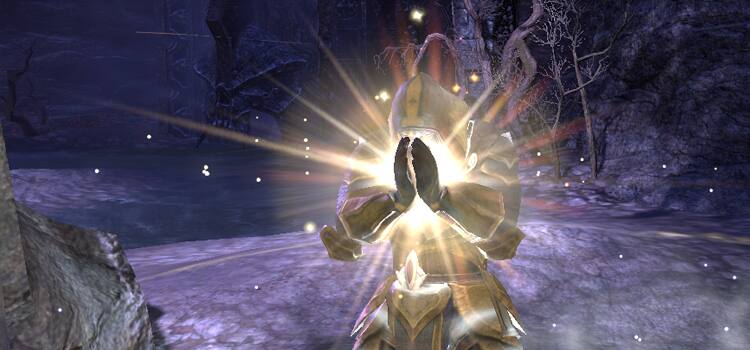
We've got a fun Templar build to share with you today from player Dreddnawt. If you love keeping your allies in the fight and being able to take plenty of hits yourself, you might want to give the Dreadnought a try the next time you venture into a dungeon or the battlefields of Cyrodiil. Find out which abilities keep this durable healer going! 22.07.2014
Today's player-submitted build will make your enemies believe you and your allies are invincible.
Fear nothing.
My character is an Orc Templar named Dreddnawt. He is heavily armed and armored, emphasizing pure survivability for himself and allies. The Dreadnought by itself has enough offense to cut through most encounters and quickly deal with bosses. In groups, Dreadnoughts can provide massive healing from the dead center of battle while fighting effectively in PvE and PvP.
Dreadnoughts are, first and foremost, healers. We preserve our allies and therefore do not focus as much on killing abilities. A mixture of a heavy armor core complimented by some light armor keeps magicka high while providing ample physical and arcane protection.

Healing Ritual (Ritual of Rebirth): This is the main heal to use when group members have taken serious damage. Cast delay means you must anticipate when it will be necessary. Ritual of Rebirth slightly reduces the cast time when fractions of a second DO make a difference.
Regeneration (Mutagen): Pop this right before combat and easily keep it going through to the end. It is inexpensive, though it only affects two allies. Double-tap to cover a group. The morph provides an additional heal if your target is injured.
Silver Bolts (Silver Shards): Fantastic spammable attack—don't let excess stamina go to waste. Bolts are effective against normal enemies but especially versus Daedra and Undead, adding damage, knockdown, and chance to Banish. In tougher situations, this can be replaced by Circle of Protection to double or triple your group's armor and spell resists.
Cleansing Ritual (Extended Ritual): First line of defense, this should be active throughout group combat. Cleansing lights up the heal area to make your range plainly visible while providing a HoT, and the Purify synergy that heals and clears negative effects. Combined with Regeneration, you and allies should remain healthy through all but the toughest encounters.
Ultimate - Rite of Passage (Practiced Incantation): Hands down best heal in the game. Rite is awesome to use, especially when you are on the verge of defeat. This heals all allies nearby from near death to full health in just a few seconds, no sweat.
Dreadnoughts also perform admirably as tanks, even though they do not focus on stamina. Use weapons and magicka-based abilities for attacks to conserve stamina for blocking, bashing, and taunts. The defensive nature of this build provides relatively low damage output, so your play style should allow allies to do the killing while you hold enemies' attention. Crowd control is handled mostly using heal-aggro and the varied status effects from skills.
Restoring Aura (Radiant Aura): Increased health and stamina regeneration is a boon for any warrior, and this covers you and any friends close enough to smell you (that's pretty far for me). This spell is easy to keep running and helps ensure you don't have stamina shortages even with a relatively shallow pool.
Puncture (Ransack): Primary taunt, physical attack, and debuff. This handy attack is the main reason to use sword and board aside from blocking bonuses. 15-second taunt, debuff the target's armor 40%, and with the morph it also buffs your own armor. That's a trifecta!
Focused Charge (Explosive Charge): BLAST into foes with morphed splash damage, dodge roll backwards and BLAST in again just for fun! More efficient charge attack than stamina-based options, and I'm a big fan of the Aedric Spear visual effects. This ability combines moving to the target and good damage with interrupts and stuns.
Spear Shards (Luminous Shards): Leading assaults with this spear gives just enough time for a quick charge to launch you into the thick of battle right as it lands. The disorient and AoE damage make this a great way to get the attention of groups and bosses alike.
Ultimate - Nova (Solar Disturbance): Just plain good fun right here. Let's see: deals wide-range AoE damage, debuffs enemy damage output, snares all targets, and has a high-damage synergy with a mass stun effect ... delightful. Only the toughest enemies are still standing when this beauty goes off, and anything left alive is going to be seriously broken.
A few minor tweaks bring the Dreadnought in line for solo play by switching the focus from bolstering allies to heavy burst damage with status effects. You can go it alone just as effectively using ranged attacks or melee.
Piercing Javelin (Binding Javelin) replaces Healing Ritual for added DPS and knockdowns while solo. Use this to keep enemies at bay while kiting with your staff.
Low Slash (Deep Slash) or Puncturing Strikes (Biting Jabs) can be swapped with Restoring Aura if stamina is not a concern while running around Tamriel. The added attack options help to quickly overwhelm enemies while solo when Aura is not as effective.
Backlash (Purifying Light) may be substituted for Spear Shards when facing large single bosses while in a group or solo. The added damage is beneficial when area attacks aren't necessary and the healing morph is a useful bonus.
Thanks again to Dreddnawt for sharing his build!
Link to official Site
Today's player-submitted build will make your enemies believe you and your allies are invincible.
Fear nothing.
My character is an Orc Templar named Dreddnawt. He is heavily armed and armored, emphasizing pure survivability for himself and allies. The Dreadnought by itself has enough offense to cut through most encounters and quickly deal with bosses. In groups, Dreadnoughts can provide massive healing from the dead center of battle while fighting effectively in PvE and PvP.
Dreadnoughts are, first and foremost, healers. We preserve our allies and therefore do not focus as much on killing abilities. A mixture of a heavy armor core complimented by some light armor keeps magicka high while providing ample physical and arcane protection.

PRIMARY SKILLS
Restoration Staff – Absorb Magicka, Defending
Rushed Ceremony (Breath of Life): First slot holds the perfect emergency heal. Good range and healing comes with a high magicka cost. This is a fallback spell used only in dire need, but it should always be available.Healing Ritual (Ritual of Rebirth): This is the main heal to use when group members have taken serious damage. Cast delay means you must anticipate when it will be necessary. Ritual of Rebirth slightly reduces the cast time when fractions of a second DO make a difference.
Regeneration (Mutagen): Pop this right before combat and easily keep it going through to the end. It is inexpensive, though it only affects two allies. Double-tap to cover a group. The morph provides an additional heal if your target is injured.
Silver Bolts (Silver Shards): Fantastic spammable attack—don't let excess stamina go to waste. Bolts are effective against normal enemies but especially versus Daedra and Undead, adding damage, knockdown, and chance to Banish. In tougher situations, this can be replaced by Circle of Protection to double or triple your group's armor and spell resists.
Cleansing Ritual (Extended Ritual): First line of defense, this should be active throughout group combat. Cleansing lights up the heal area to make your range plainly visible while providing a HoT, and the Purify synergy that heals and clears negative effects. Combined with Regeneration, you and allies should remain healthy through all but the toughest encounters.
Ultimate - Rite of Passage (Practiced Incantation): Hands down best heal in the game. Rite is awesome to use, especially when you are on the verge of defeat. This heals all allies nearby from near death to full health in just a few seconds, no sweat.
Dreadnoughts also perform admirably as tanks, even though they do not focus on stamina. Use weapons and magicka-based abilities for attacks to conserve stamina for blocking, bashing, and taunts. The defensive nature of this build provides relatively low damage output, so your play style should allow allies to do the killing while you hold enemies' attention. Crowd control is handled mostly using heal-aggro and the varied status effects from skills.
SECONDARY SKILLS
Mace and Shield – Crushing, Defending
Rushed Ceremony (Breath of Life): This is an emergency heal that should be used sparingly, but having the ability to instantly self-heal when needed does wonders for surviving tough battles.Restoring Aura (Radiant Aura): Increased health and stamina regeneration is a boon for any warrior, and this covers you and any friends close enough to smell you (that's pretty far for me). This spell is easy to keep running and helps ensure you don't have stamina shortages even with a relatively shallow pool.
Puncture (Ransack): Primary taunt, physical attack, and debuff. This handy attack is the main reason to use sword and board aside from blocking bonuses. 15-second taunt, debuff the target's armor 40%, and with the morph it also buffs your own armor. That's a trifecta!
Focused Charge (Explosive Charge): BLAST into foes with morphed splash damage, dodge roll backwards and BLAST in again just for fun! More efficient charge attack than stamina-based options, and I'm a big fan of the Aedric Spear visual effects. This ability combines moving to the target and good damage with interrupts and stuns.
Spear Shards (Luminous Shards): Leading assaults with this spear gives just enough time for a quick charge to launch you into the thick of battle right as it lands. The disorient and AoE damage make this a great way to get the attention of groups and bosses alike.
Ultimate - Nova (Solar Disturbance): Just plain good fun right here. Let's see: deals wide-range AoE damage, debuffs enemy damage output, snares all targets, and has a high-damage synergy with a mass stun effect ... delightful. Only the toughest enemies are still standing when this beauty goes off, and anything left alive is going to be seriously broken.
A few minor tweaks bring the Dreadnought in line for solo play by switching the focus from bolstering allies to heavy burst damage with status effects. You can go it alone just as effectively using ranged attacks or melee.
ABILITY SWAPS
Sun Fire (Reflective Light) takes the place of Cleansing Ritual for added DPS and a snare while solo. Having this on your staff set allows easy kite-fighting from range when combined with Javelin and Bolts.Piercing Javelin (Binding Javelin) replaces Healing Ritual for added DPS and knockdowns while solo. Use this to keep enemies at bay while kiting with your staff.
Low Slash (Deep Slash) or Puncturing Strikes (Biting Jabs) can be swapped with Restoring Aura if stamina is not a concern while running around Tamriel. The added attack options help to quickly overwhelm enemies while solo when Aura is not as effective.
Backlash (Purifying Light) may be substituted for Spear Shards when facing large single bosses while in a group or solo. The added damage is beneficial when area attacks aren't necessary and the healing morph is a useful bonus.
Thanks again to Dreddnawt for sharing his build!
Link to official Site
Load more

Can you post your armor sets/ heavy light mix and possibly how you glyphed
6
+10
-1