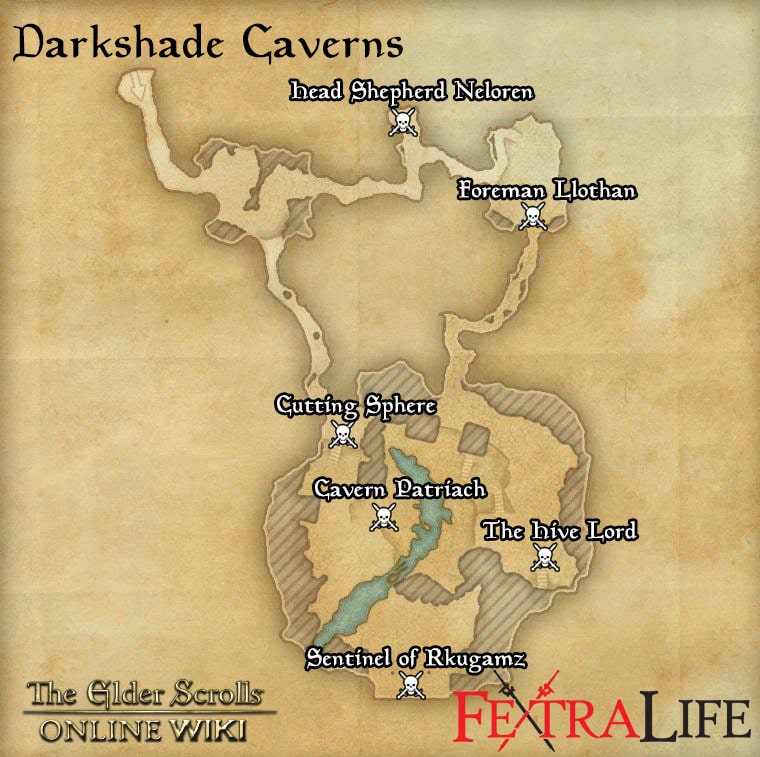
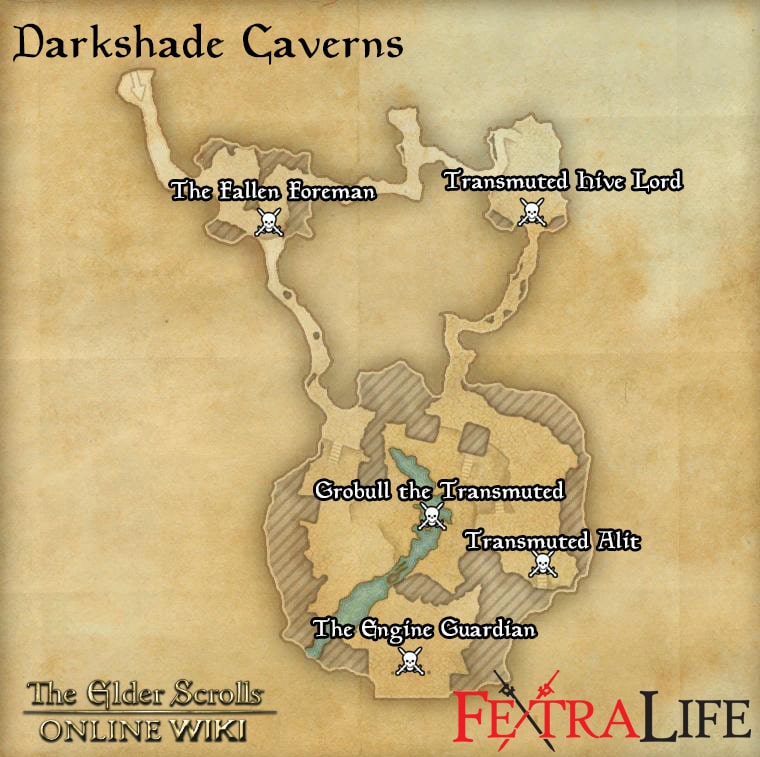
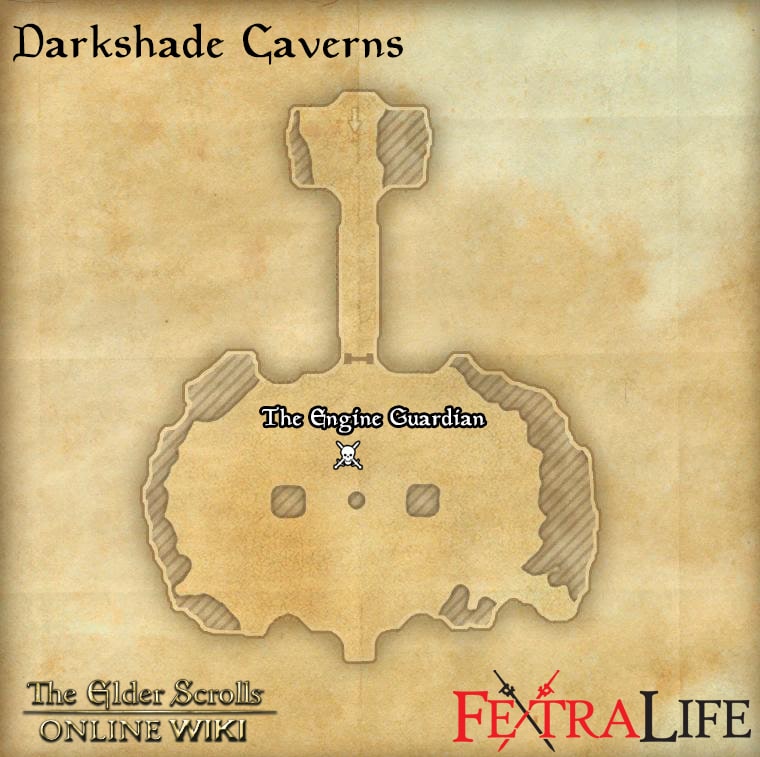
There are multiple versions of this dungeon, please click tabs to see their information, or go to their individual pages.
Darkshade Caverns is a 4-man dungeon in Elder Scrolls Online. It is located all the way at the southeastern edge of Deshaan. Players can use the Group & Activity Finder tool to easily find groups to tackle this dungeon with.
Veteran Walkthrough & Strategies
Head Shepherd Neloren
level
HP
Boss mechanics
- Compared to other bosses, Neloren has a small Health pool, and to compensate for that she heals herself.
- Neloren casts a flame attack projectile which deals flame damage to anyone caught in it. Just don’t bunch up and you’ll be fine. Even if you did bunch up for the whole fight, I doubt you would ever die.
Foreman Llothan
level
HP
Boss mechanics
- Llothan periodically runs to different locations in the room. He will lift his staff in the air and summon 6 kwama adds with low Health. They can be, and should be, AOE’d down easily.
- The main threat of this battle is Llothan’s AOE attack which he casts in a small radius around him. Anyone caught in the red circle will take massive shock damage and get knocked down. This will easily be the biggest source of damage in this fight, which is totally avoidable.
- Llothan periodically casts pools of poison on the ground. You have a small period of time to get out of the spot. If you get hit by the poison, you’ll take poison damage over time. It’s not deadly, but does hurt.
The Hive Lord
level
HP
Boss mechanics
- The main threat is Hive Lord’s massive AOE attack. He will stay still and slam his fists on the ground, creating a LARGE red circle around him. Anyone caught in the circle will take damage in pulses. The longer you stay in it, the more damage you will take. Getting hit by one or two pulses will not kill you, but staying in the red circle will.
- From time to time, The Hive Lord hunkers down to summon a bunch of kwama adds. These have very little health and can be AOE’d down easily.
- The Hive Lord also randomly jumps to distant targets and deals a bit of physical damage in the process.
- The Hive Lord has afrontal cone slam attack, which is very hard to avoid. You are not given much time dodge this at all. The tank should make sure the Hive Lord is only ever facing him.
Cavern Patriarch
level
HP
Boss mechanics
- Cavern Patriarch plants a poison standard which deals a bit of poison damage to anyone in the radius.
Cutting Sphere
level
HP
Boss mechanics
- Be careful of the whirlwind attack he keeps channeling around him. Its not fatal, but it’s still a good idea to spread out.
- AOE the dwarven spider adds down first and then kill the Sphere.
Sentinel of Rkugamz
level
HP
Boss mechanics
- The Sentinel sometimes starts chasing a random player whilst doing a whirlwind attack around him. Just kite him during this attack.
- When the boss gets below 25% Health, 3-4 dwarven spiders will spawn and run to random locations in the area. They’ll generate a green bubble / shield above them which will heal the boss if he touches the bubbles. As long as you don’t get close to the spiders, you can safely ignore them altogether and just burn the boss down.
- The Sentinel has a frontal cone attack which is very difficult to avoid. The tank should face him away from the group.
- Sentinel of Rkugamz sometimes stops to charge his weapon with lightning. He’ll mortar down pools of lightning on players’ locations. The pools will increase in size. As long as you are moving, you should not get hit by them. If you do, you’ll take a fair bit of shock damage.
Trivia
- ??
Darkshade Caverns Information
- Location: Deshaan
- Suggested Level:
- Final Boss: Sentinel of Rkugamz
- Achievements:
Achievements
- Darkshade Caverns I Vanquisher
- Darkshade Caverns I Conqueror
- Well Out of Warranty
- Veteran Kwama Slayer
- Veteran Pit Rat Slayer
- Darkshade Caverns I Survivor
- Darkshade Caverns I Assassin
Quests
Darkshade Caverns Map
Bosses
Set Drop
NPCs in the area
- ??
Notable Items
- ??
Enemies
- ??
Darkshade Caverns is a 4-man dungeon in Elder Scrolls Online. It is located all the way at the southeastern edge of Deshaan. Players can use the Group & Activity Finder tool to easily find groups to tackle this dungeon with.
Veteran Walkthrough & Strategies
Overall this dungeon is a very straight forward dungeon. The boss fights are fairly easy if your group has good synergy and doesn't decide to stand in the red AoE.
The Fallen Foreman
- There are adds at the start of this fight. Boss casts a slow, but high damage spell.
- Focus on killing all the adds first.
- Make sure you interrupt the Bosses spell, tank should stay on her while everyone kills adds.
- Boss does a Fire cone and rotates clockwise.
- Just follow behind it or be running round ahead of it as tank or melee. For anyone else, just be out of range (the stairs are a good place to stand).
Transmuted Hive Lord
- Boss does a heavy hit which knocks down.
- As tank be sure to block the big scary hits.
- Two adds fight alongside boss, these can knock you unconscious and drain your stamina.
- You have two choices – one is to ignore the adds and focus on the boss (If the add knocks you down, you can Break Free). The other choice is to kill the adds and then attack boss. I prefer to ignore the adds personally, but AOE to your heart’s content if you wish.
- Adds burrow, boss gets a damage shield and pounds ground doing AOE damage. This will not stop until enough damage is done to break the shield.
- DPS the boss so that the shield breaks and the fight continues as normal.
Mini Boss A – Transmuted Alit
- 3 Alits which do heavy attacks. When one dies you must kill the others within a short period of time or the dead Alit will revive (though with little hp).
- Tank aggro all 3 and block, then the team just AOE DPS the 3 down. Don’t panic if one drops too soon, if they come back to life their hp is so low that they will drop again.
- If attempting a speed run, be aware you do not need to kill this boss.
Boss 3 – Grubull the Transmuted
- Boss teleports and unleashes a hard hitting AOE.
- Be quick on your feet and get out of the way when boss teleports near you. Tank cannot do anything to prevent the boss teleporting to others.
- Boss will be shielded, small adds will spawn as well as some larger ones.
- Tank aggros the larger mobs, everyone gather close and AOE down the small mobs alongside the larger one.
- After adds are dead, boss is no longer shielded and drops to ground.
- All out DPS on the boss – if tank then have DPS set up on bar 2, same for healer.
- Boss will reshield and the mechanics start again.
Mini Boss B – Waves of Mech Mobs
- Not exactly a boss, but nasty nevertheless, stay by the river’s edge and pull the first group.
- Centurion and a pack of adds attack, as the fight goes on, the next pack will come, then the next.
- Tank take the Centurion and ideally the Dwarven Spheres and gather everything up, rest of the Team DPS everything down asap.
- If you do not kill fast enough you may end up with multiple Centurions, these hit like trucks and makes things difficult. I have no great strategy for this other than to AOE DPS the crap out of everything.
Boss 4 – The Engine Guardian
- Has 3 phases, Fire (Red), Poison (Green), Lightning (White).
- Red Phase, boss throws fireballs n players to form ground AOEs, in melee range the boss essentially has a rotating flame thrower.
- Range is key. Everyone stay around the middle and damage the boss from afar. No need to actually aggro this boss as he just walks around. Move out of the way of ground AOE, stay close to healer.
- Green phase, poison damage ticks on all players, you cannot avoid this.
- (Hard solution for achievement) Stay close together, healer keep everyone healthy, carry on damaging boss.
- (Easy solution) There are 4 levers in the middle of the room wher you are standing. Using these will stop the poison – NOTE: I THINK that is what happens. I confess, I do not know as despite having run this dungeon many a time, my groups have never actually used the levers (we got the achievement first time we came here, so ever since have just carried on without bothering with levers).
- White phase, VERY high damage ticks if close to boss.
- Stay away from the boss! If you have been fighting from the middle, this should be a non-issue, if you have been daring to attack from melee, you need to run like crazy when this phase starts or you will die.
- 3 Dwarven Sphere adds spawn throughout the fight.
- These guys have a range attack which hurts and means getting them close to AOE is a pain. Best technique is to use Line of Sight via the pillars around the middle to lure them close.
- Tank aggro the mobs, then team AOE if mobs are close enough, if not then focus one at a time.
- As soon as mobs are dead, DPS boss again.
If you have melee in the team, then this fight is not great for them. Their main use will be killing the adds. Having said that, if they have self healing/a way to protect themselves, during poison and fire phase they can get close to do damage. (A favourite technique of mine as Templar is to keep Crit Rushing and Blazing Shield as the poison DoT and the flamethrower will burst my bubble)
Trivia
- ??
General Information
- Location: Deshaan
- Suggested Level: 20-23
- Final Boss:Cutting Sphere
- Achievements: 6
Achievements
- Darkshade Caverns: Defeat Akash gra-Mal, Chokethorn, and Canonreeve Oraneth.
- Veteran Darkshade Caverns: Defeat Dark root, Murklight and Bogdan the Nightflame.
- Veteran Darkshade Caverns Banekin: Kill banekin in Veteran Darkshade Caverns.
- Veteran Darkshade Caverns Lurchers: Kill lurchers in Veteran Darkshade Caverns.
- Veteran Darkshade Caverns Speed: Defeat Bogdan the Nightflame within twenty minutes of starting Veteran Darkshade Caverns.
- Veteran Darkshade Caverns Undaunted: Defeat Bogdan the Nightflame after reading the Opus of Torment.
Quests
Darkshade Caverns Map
Bosses
Set Drop
NPCs in the area
Notable Items
- The Art of Kwama Egg Cooking
- Ithisa's Journal
Enemies
- Pit Rats
 Anonymous
So not sure if anyone else has seen but, there's a jumping puzzle in the first room of the mine. the final part you get to had nothing special for me but it looked really suspiciously as if it could house a chest sometimes

 Anonymous
dont know about other people, but transmuted alit's revive at full life in all the groups i been in that failed to kill all 3 together the first time around.


The Engine Guardian -> levers disable poison .... you must pull all 4
1
+15
-1